This is the multi-page printable view of this section. Click here to print.
IBM i How-To Documents
1 - Accessing the IBM i Console
This article explains two ways to access the IBM i console. The first method is through the IBM Power for Google Cloud (IP4G) user interface. The second method is through a LAN console.
IP4G web console
Browse to an IBM i instance from the VM Instances list. Then, click on the Console button in the actions toolbar:

A VNC window connected to the console session will open.
Use the tool bar at the bottom to access the Extended Function keys, F13 through F24. Some users may need to scroll the VNC window down to see them.

The shift key does not always work for the Extended Function keys. Click the “Next P…” button to display the Extended Function Keys.
The web console will time out occasionally. A session can be re-established by refreshing the IP4G web interface page.
LAN Console
Optionally, set up a LAN console by adding an additional network interface to the Virtual Machine (VM). This can be done via the pcloud command line.
Obtain a list of the available networks:
pcloud compute networks list
NetworkID                             Name                 VLANID
2c45110a-2a33-4880-a90d-000000000000  test-network-1       334
932cda0c-6cc7-4a5a-93f2-000000000000  test-network-2       111
fcc506f3-70e2-45a2-9ee3-000000000000  test-network-3       20
Obtain a list of the available VM instances:
pcloud compute instances list
NetworkID                             Name                 VLANID
...
36e0b4ac-1e63-410d-97f2-000000000000  tst-ibmi72      ACTIVE   OK      [10.3.4.116]
...
Attach a second network interface to the VM. Specify the network name and the VM instance name obtained above.
pcloud compute instances attach-network tst-ibmi72 --network test-network-1
When this command executes, IP4G assigns the network and selects an IP from the pool. Use this IP for the Service Tools LAN Adapter. However, it will need assigned manually. Use the following command to view the new network:
pcloud compute instances describe tst-ibmi72
instanceID: 36e0b4ac-1e63-410d-97f2-000000000000
name: tst-ibmi72
...
systemType: s922
cores: 1
procType: dedicated
memory: 8
pinPolicy: none
status: ACTIVE
...
networks:
- ipAddress: 10.3.4.142
  macAddress: 00:00:00:00:00:00
  networkName: test-network-1
...
Per the example, the new network interface uses the IP address 10.3.4.142.
Use the following command to determine the resource name of the new interface:
WRKHDWRSC *CMN

In this example, the new adapter is CMN05. This is the device to use in Service Tools. When added via the pcloud command, cloud-init may create a line description for the new device. Check this with the WRKLIND command. If needed, vary off and delete the new line description if one was created.
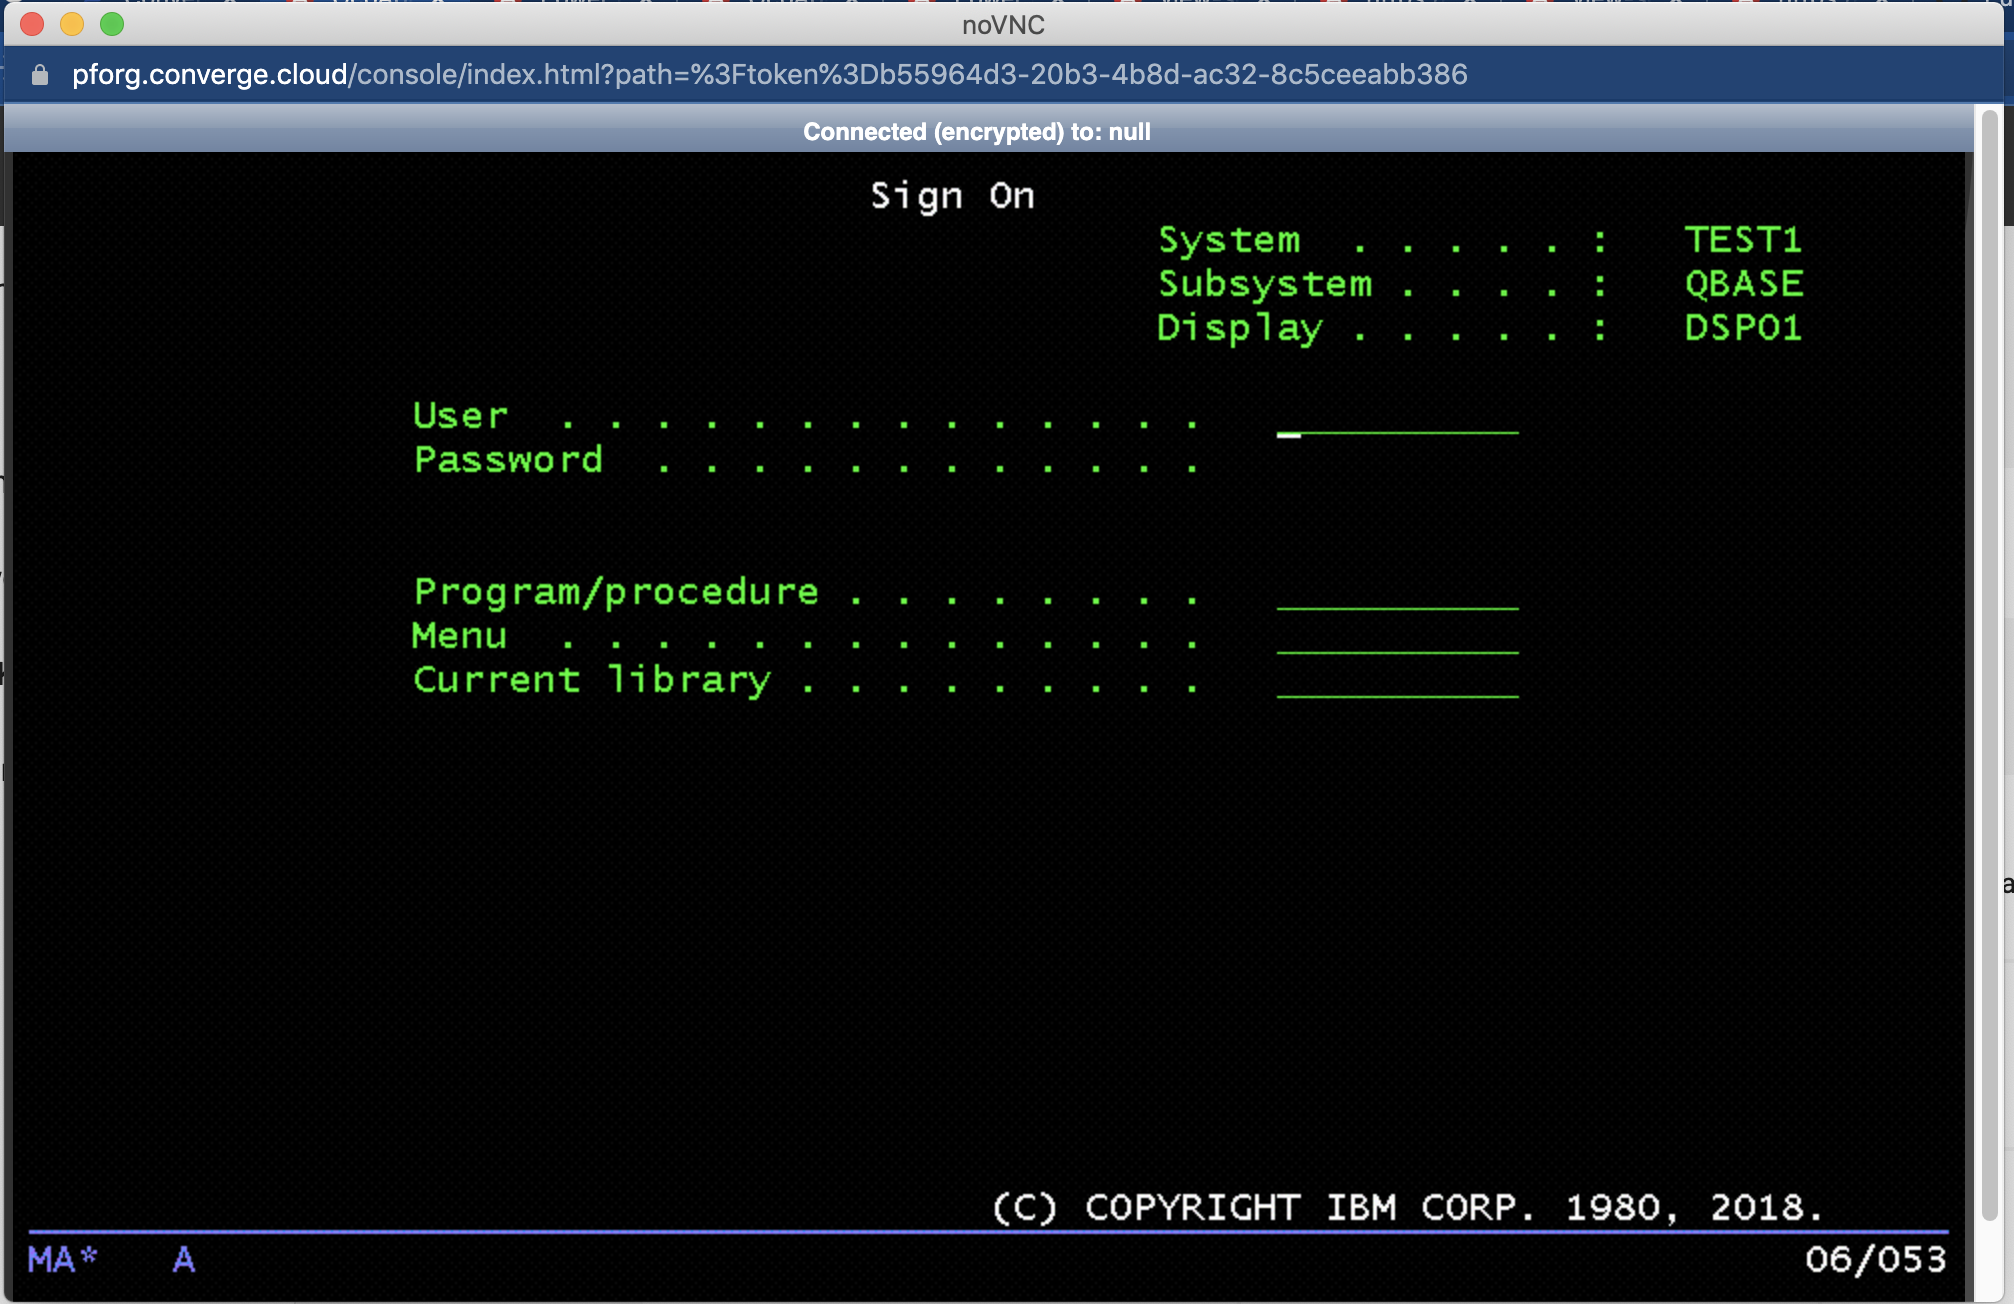
Start Service Tools:
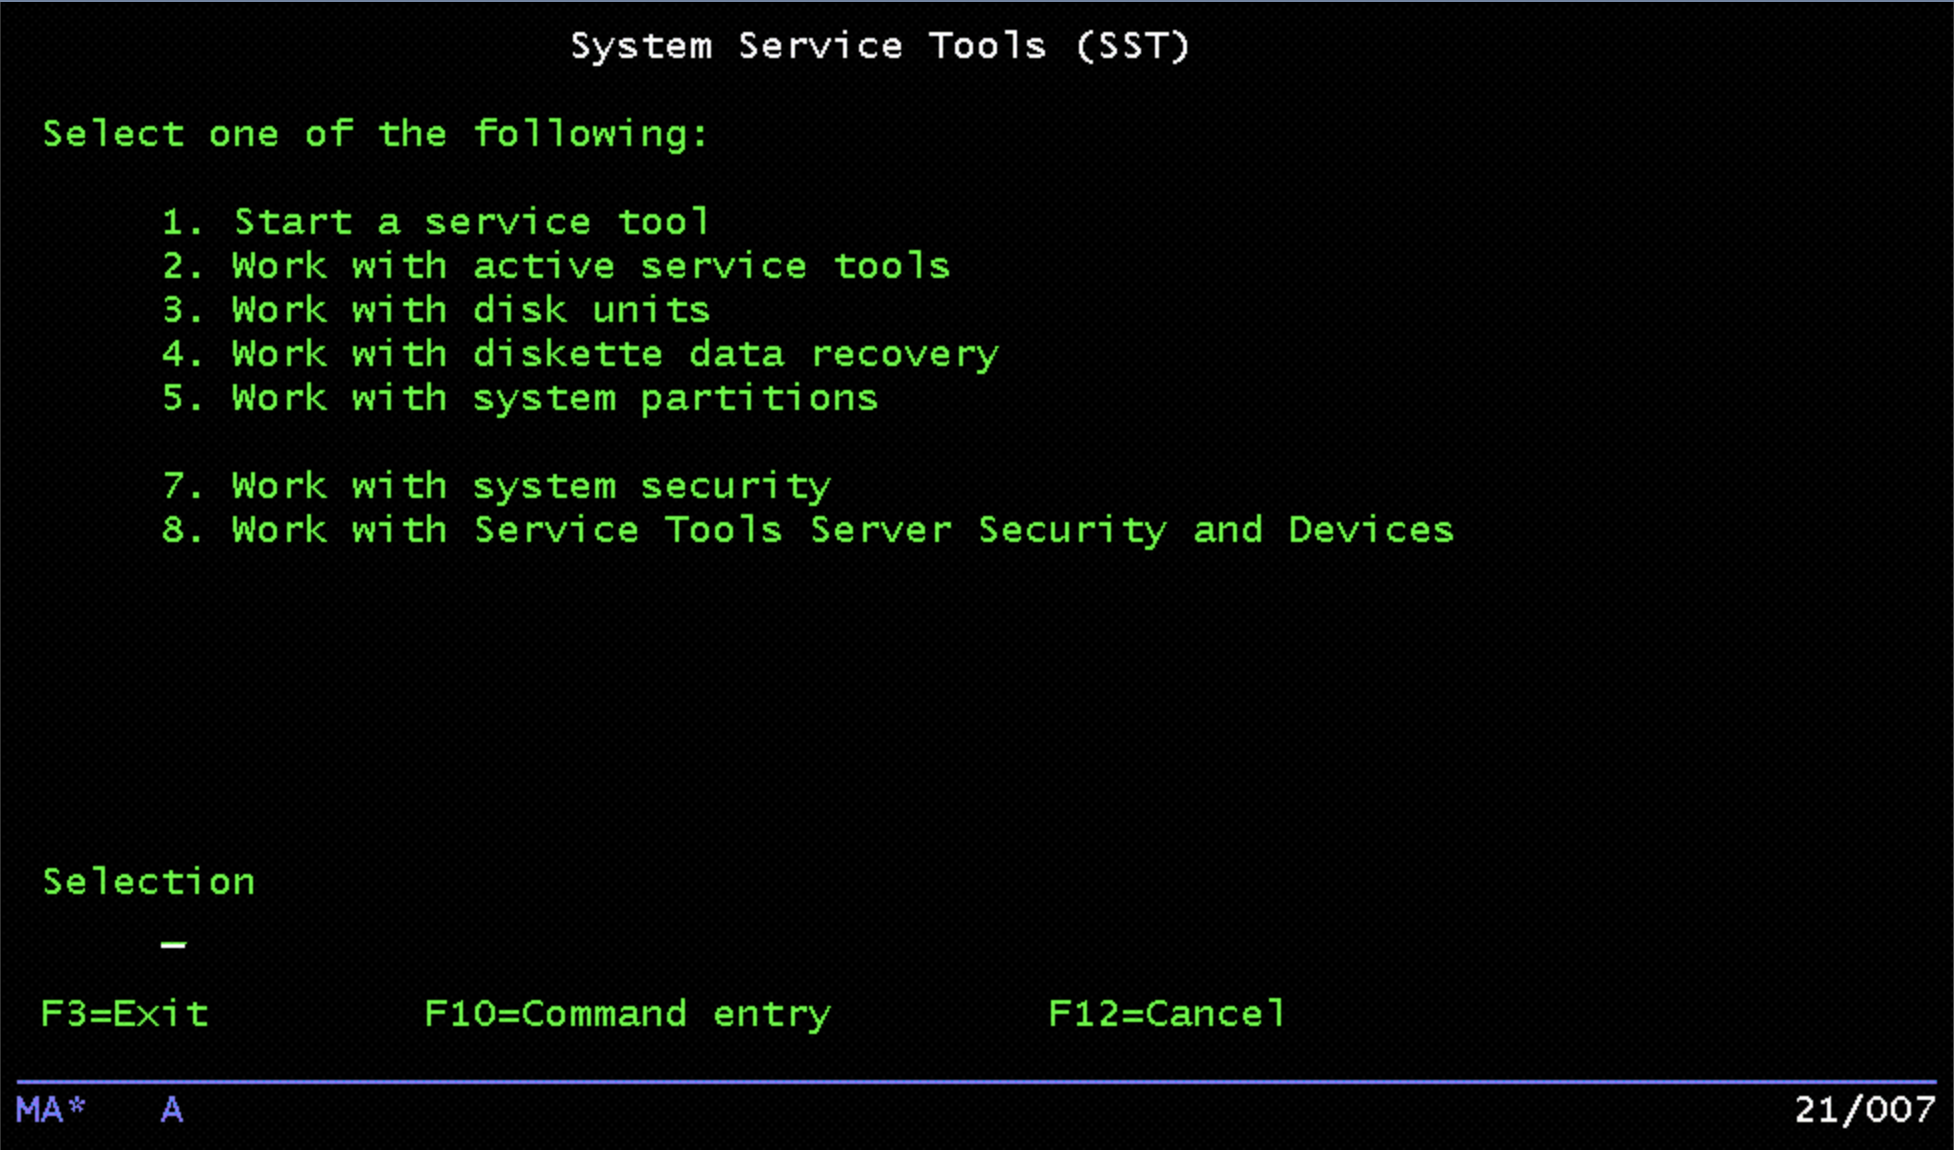
Choose Option 8, “Work with Service Tools Server Security and Devices”:
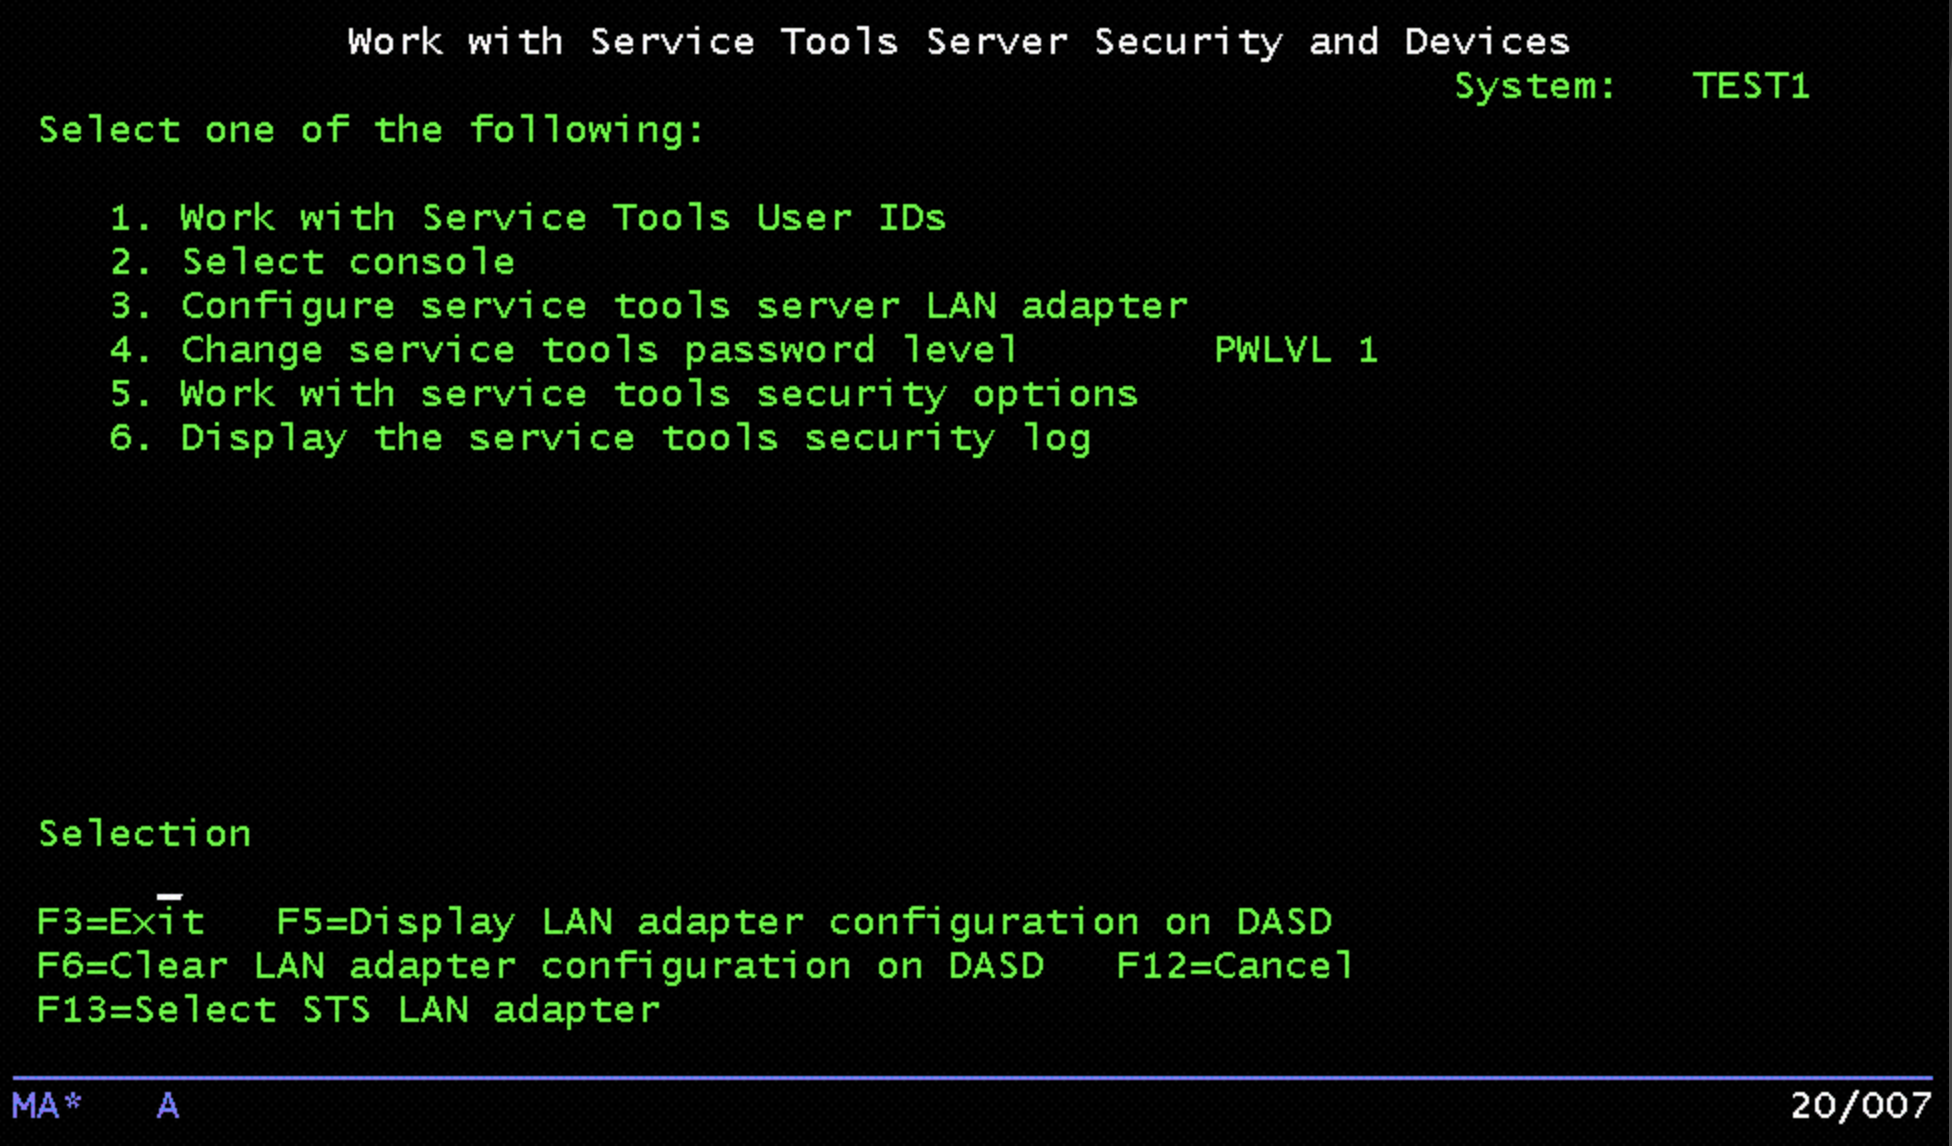
Press F13 (Select STS LAN adapter). A list of the available resources will be displayed:
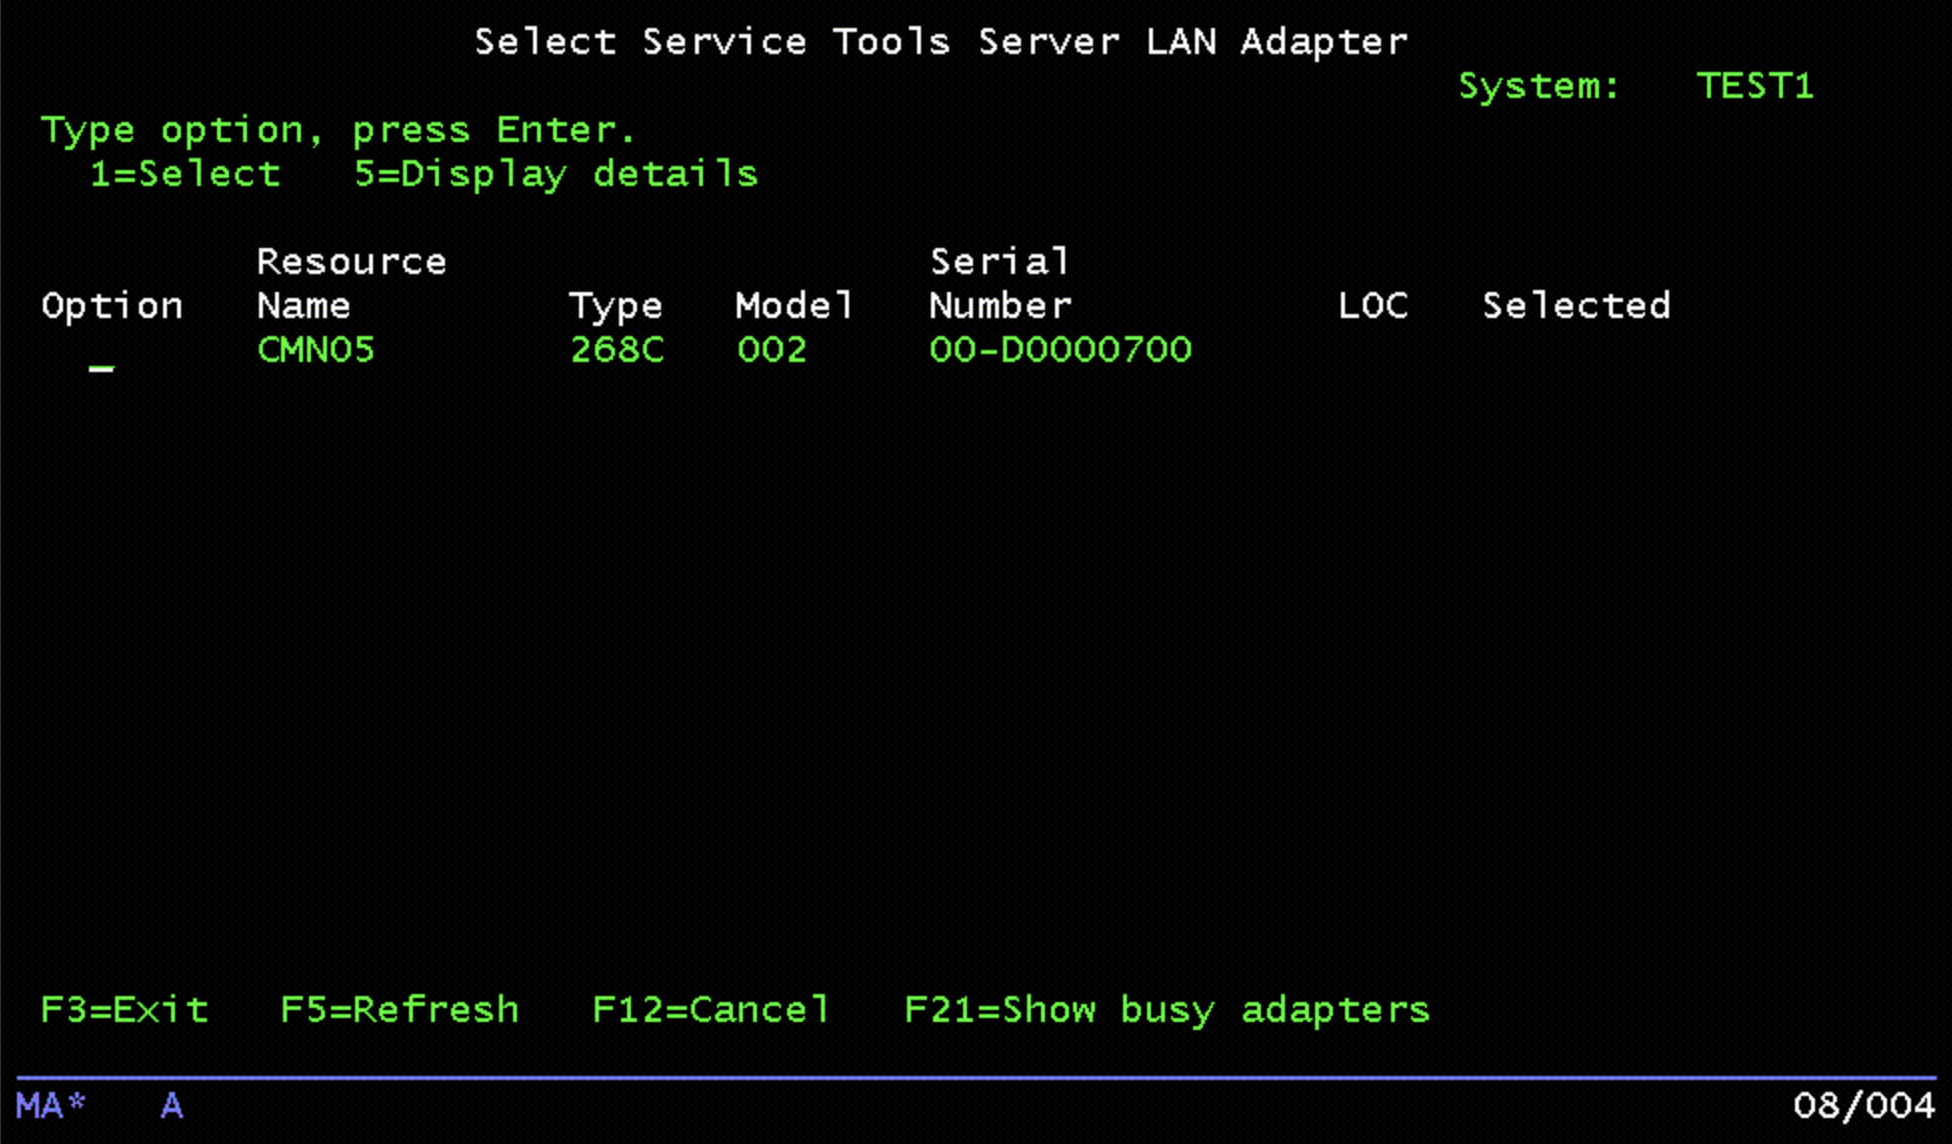
Choose Option 1, then press Enter to go to the configuration panel. Enter the IP address recorded earlier. Then, enter the matching netmask from the IP4G network configuration:
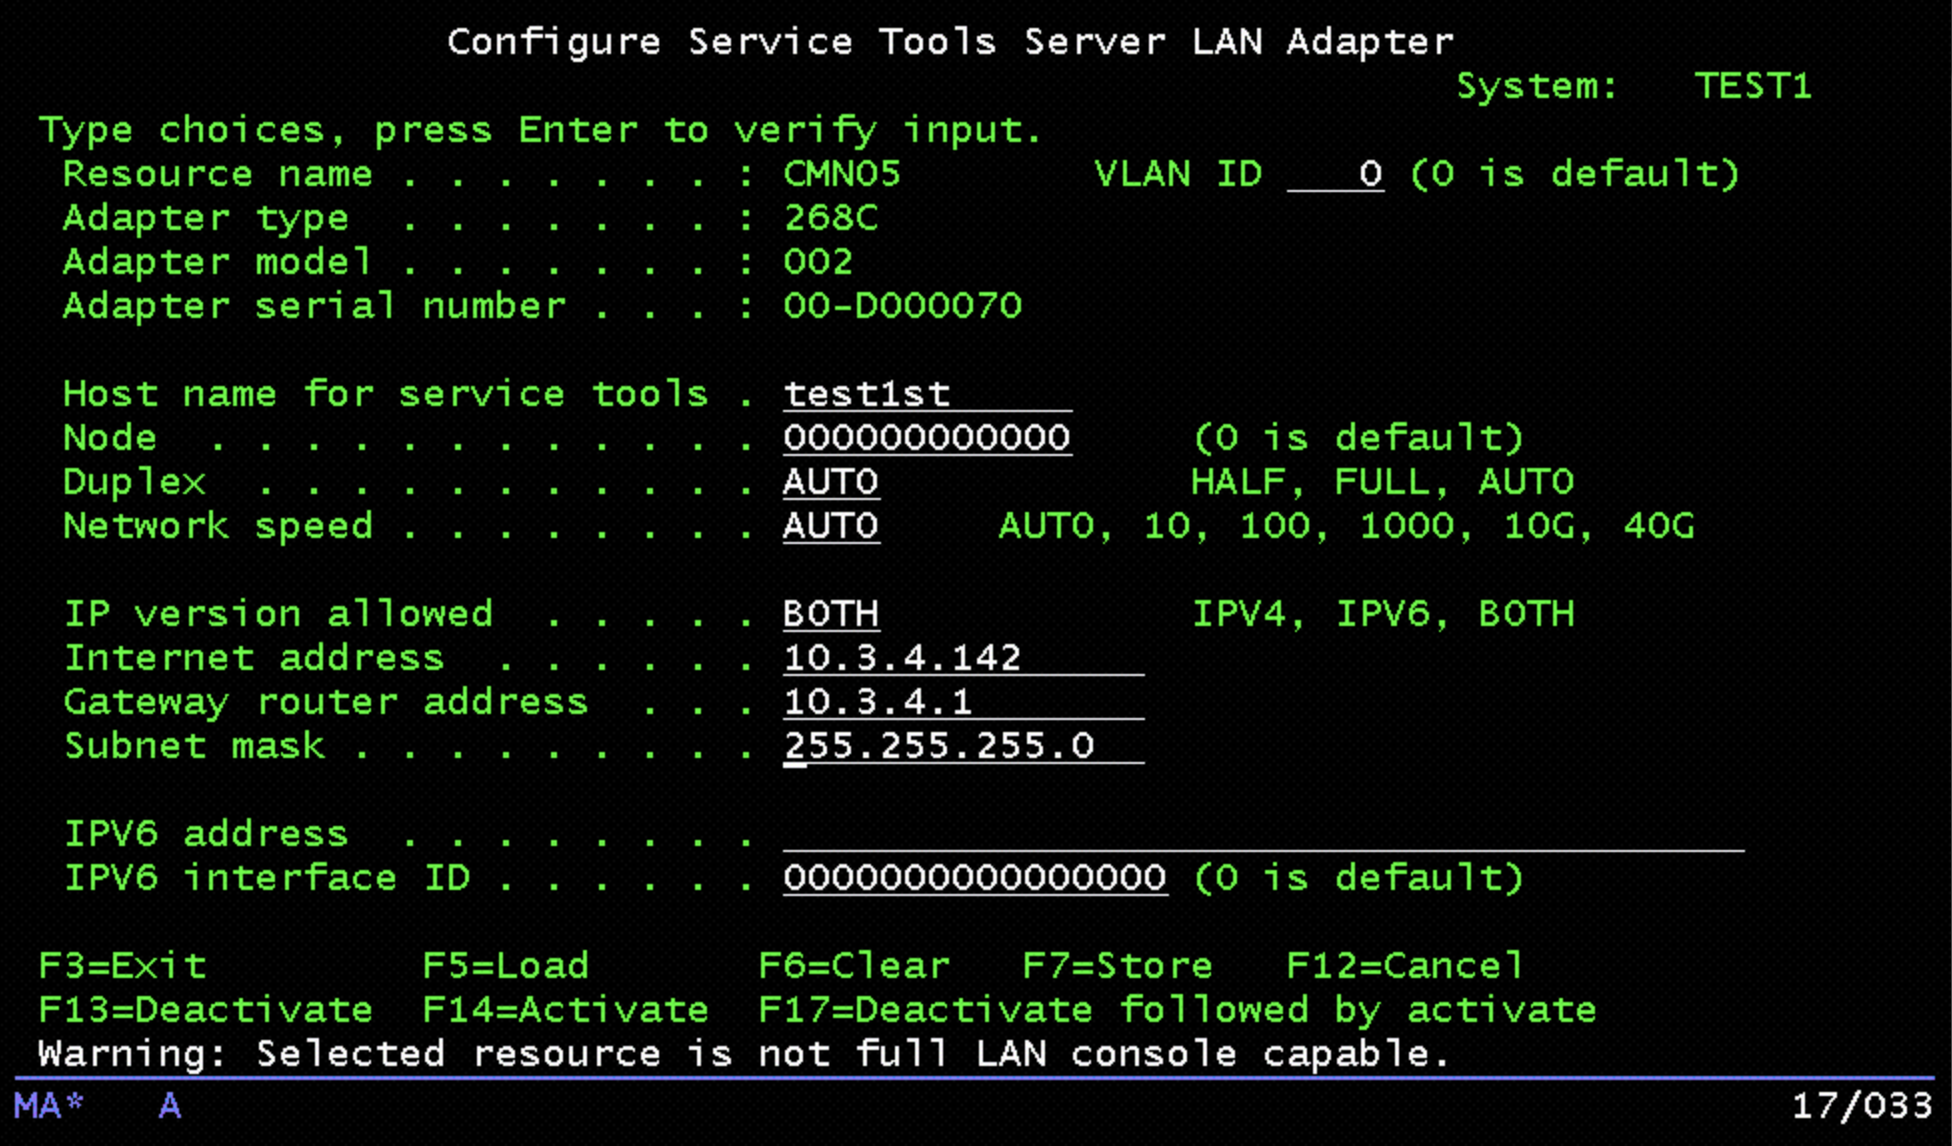
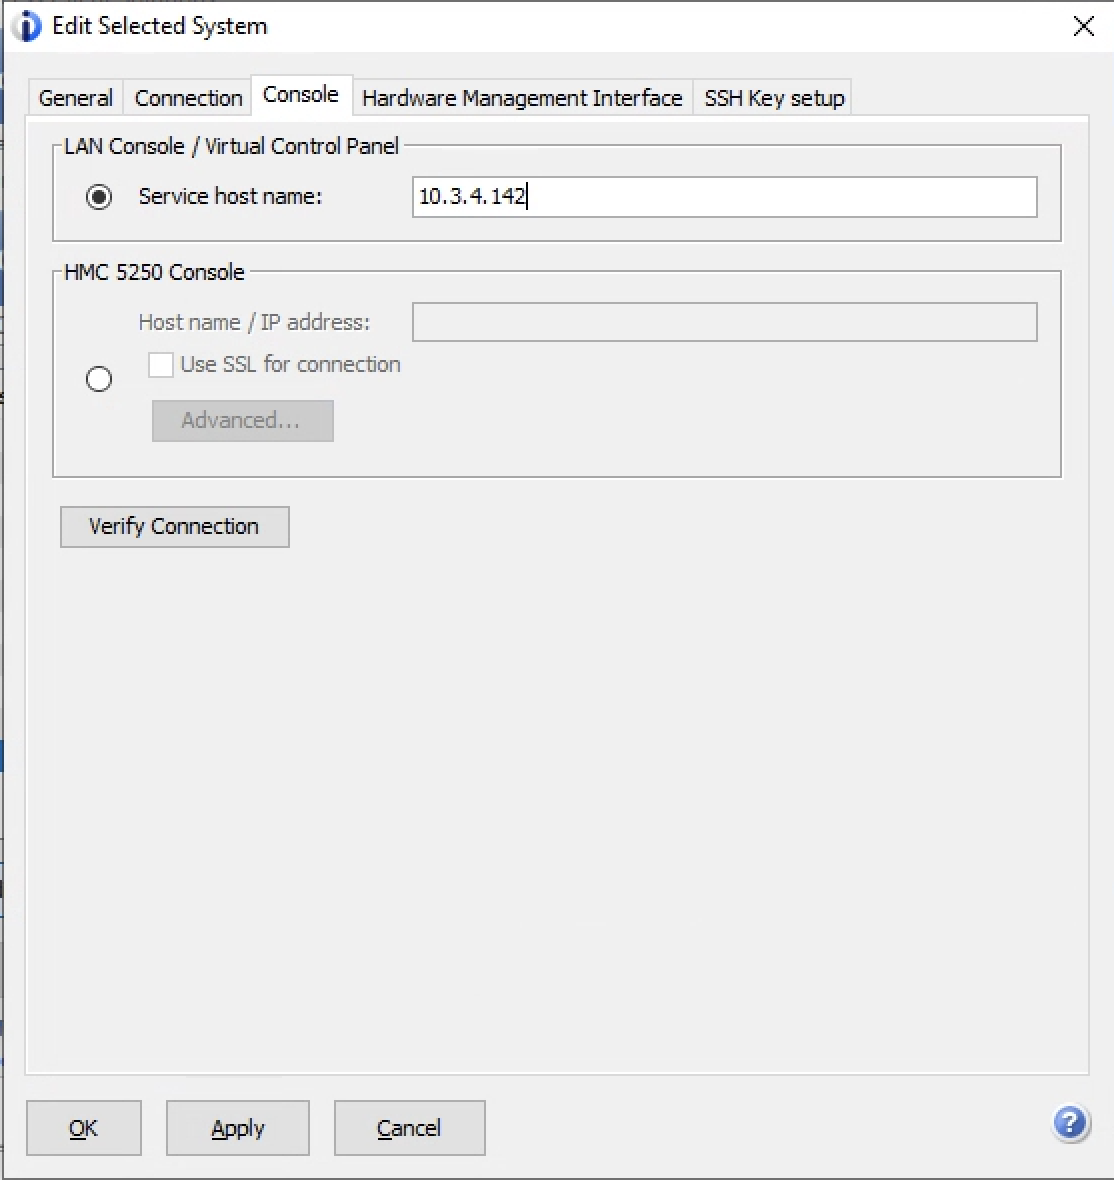
Press F7 to store the configuration. Then press F17 to de-activate/activate the adapter. It should then be possible to ping the IP address of the adapter. Use this as the console address in IBM i Access Client Solutions:
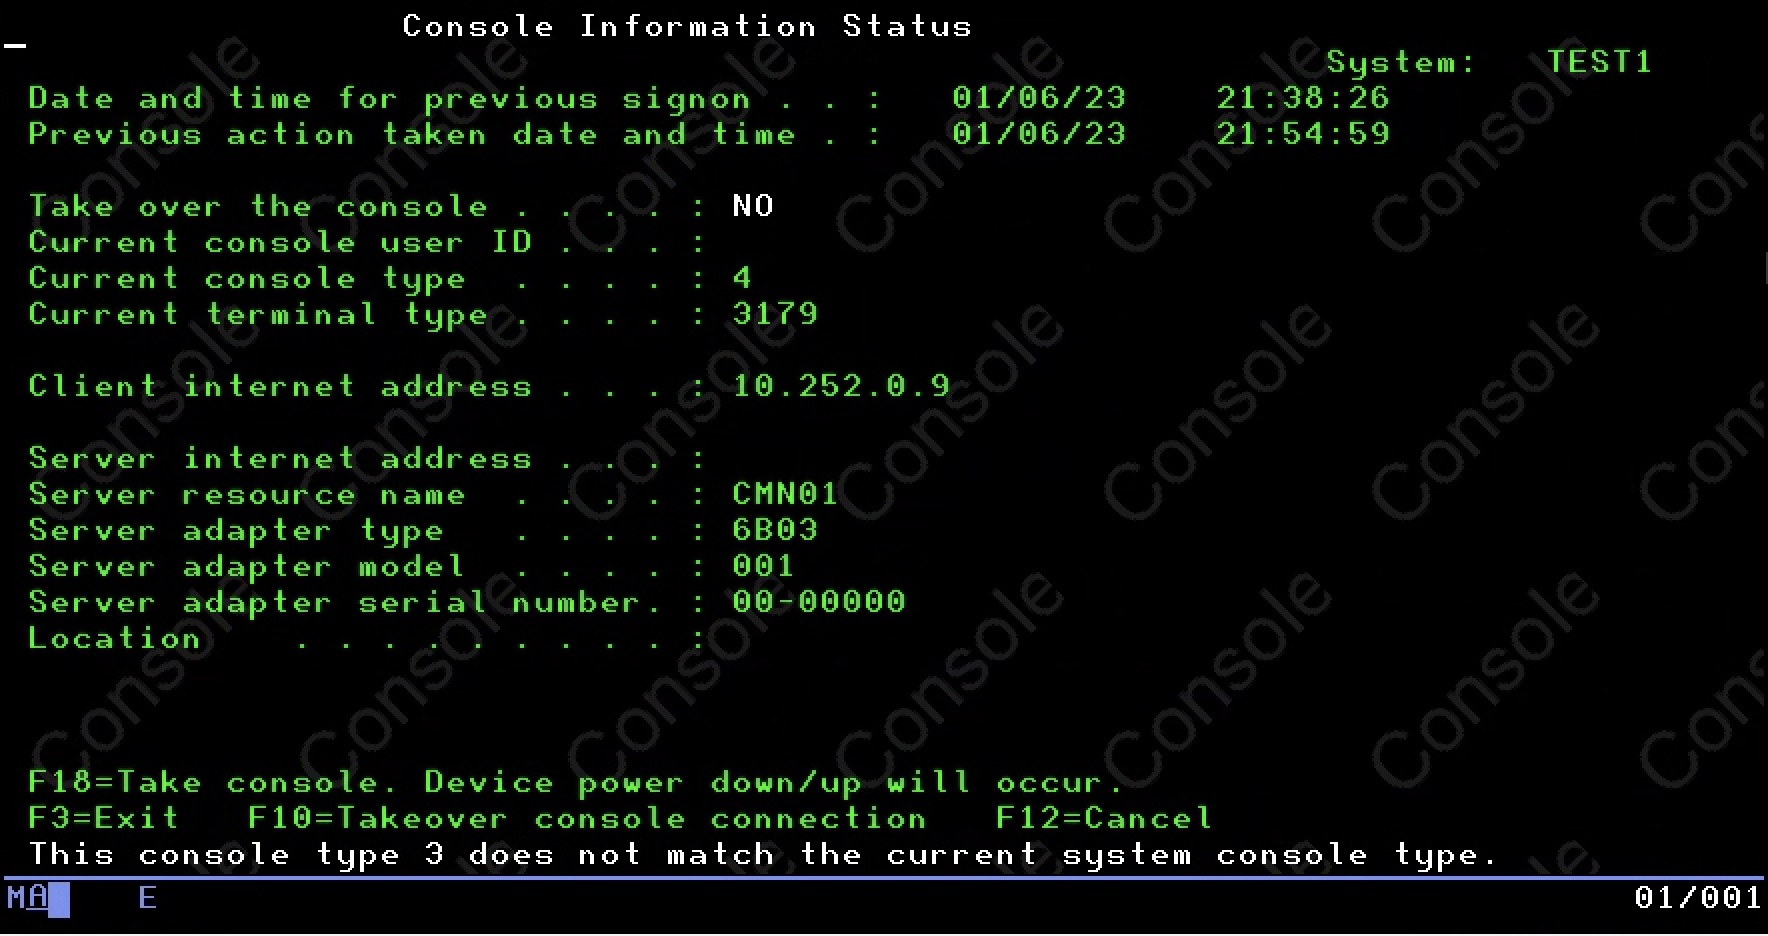
Once configured, use the “5250 Console” link in IBM i Access Client Solutions to access the console. Optionally, take over the console if prompted. Use the default user account to connect. The default user account uses “11111111” as the user name and password. Alternately, use an account created in Service Tools.
2 - Accessing IBM i Virtual Machines
This article covers how to access IBM i virtual machines (VMs) in IBM Power for Google Cloud (IP4G). Use the following information to access newly created IBM i virtual machines (VMs). Typically, end-users access IBM i VMs running in IP4G the same way they access IBM i systems running on-premises. Network traffic directed to IP4G VMs normally routes over any of the available connectivity methods. However, if network connectivity has not been completed, use the following procedures to gain access.
Requirements:
- IP connectivity to IP4G VM
- IBM i Access Client Solutions (iACS) installed per IBM Documentation
Configuring port forwarding
Use any 5250 emulator to access IP4G VMs using SSH tunelling to forward port 23. IBM i Access Client Solutions (iACS) requires forwarding several other ports for licensing and other system administrative functions. By default the majority of the required ports are blocked by IP4G and Google Cloud firewalls. Leverage SSH tunneling to forward these ports to a local workstation and gain access.
First, start the required TCP/IP servers on the VM:
- SSH - For remote logins
STRTCPSVR SERVER(*SSH)
- ADMIN HTTP server - IBM i Navigator & Digital Certificate Manager
STRTCPSVR SERVER(*HTTP) HTTPSVR(*ADMIN)
- Telnet - Remote TN5250 sessions
STRTCPSVR SERVER(*TELNET)
The required ports to forward are:
- 23
- 2001
- 2005
- 449
- 8470-8476
Configuring port forwarding under macOS or Linux
If using a Mac or Linux system, use the following command or similar:
ssh -L 50000:localhost:23 -L 2001:localhost:2001 -L 2005:localhost:2005 \
-L 449:localhost:449 -L 8470:localhost:8470 -L 8471:localhost:8471 \
-L 8472:localhost:8472 -L 8473:localhost:8473 -L 8474:localhost:8474 \
-L 8475:localhost:8475 -L 8476:localhost:8476 -o ExitOnForwardFailure=yes \
-o ServerAliveInterval=15 -o ServerAliveCountMax=3 <user>@<ipaddress>
Where <user> is QSECOFR or another user created on the target VM, and
<ipaddress> is the IP address of the IP4G VM.
Configuring port forwarding under Windows using PuTTY
If using a Windows system, you can use the free PuTTY utility.
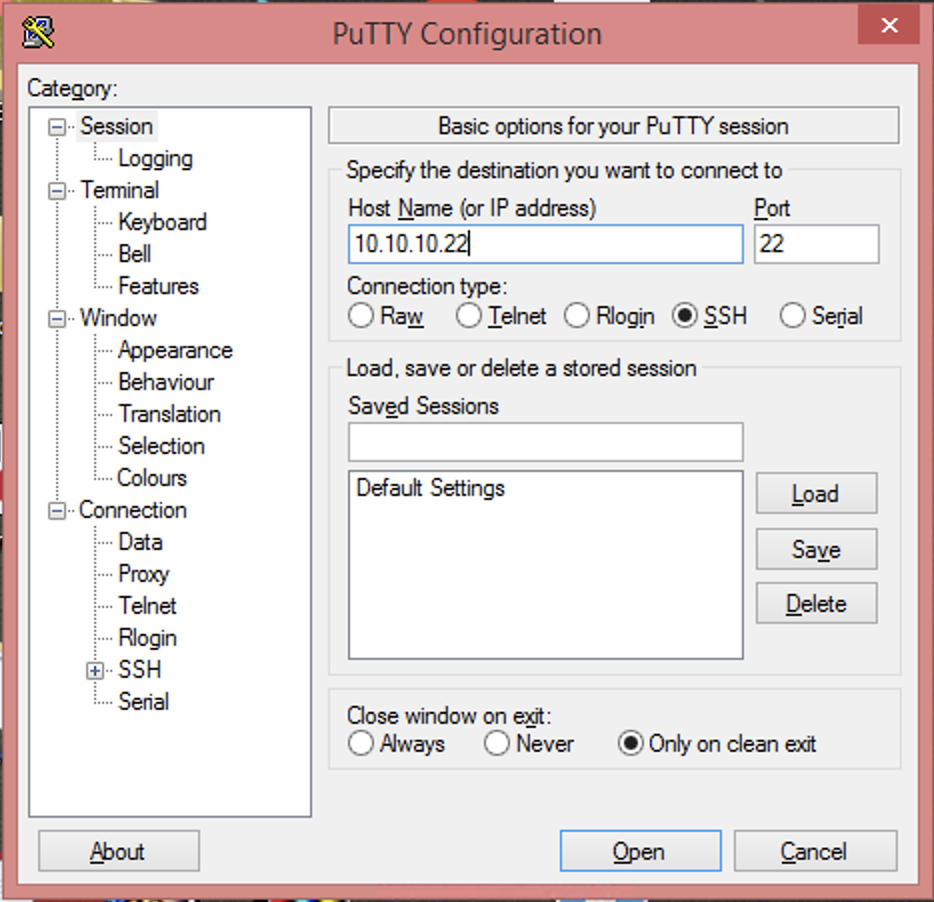
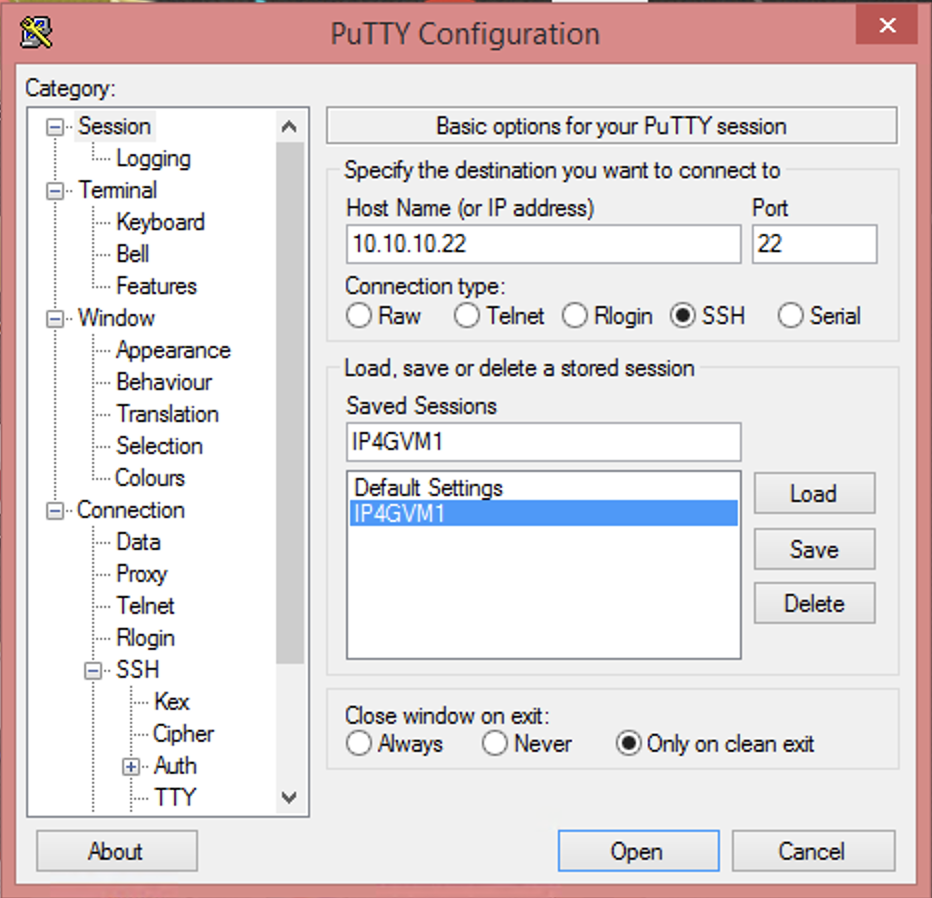
Launch PuTTY. Under Session, fill in the Host Name (or IP address) field. Use the public IP address of the IBM i VM in IP4G. For Connection type, select SSH.
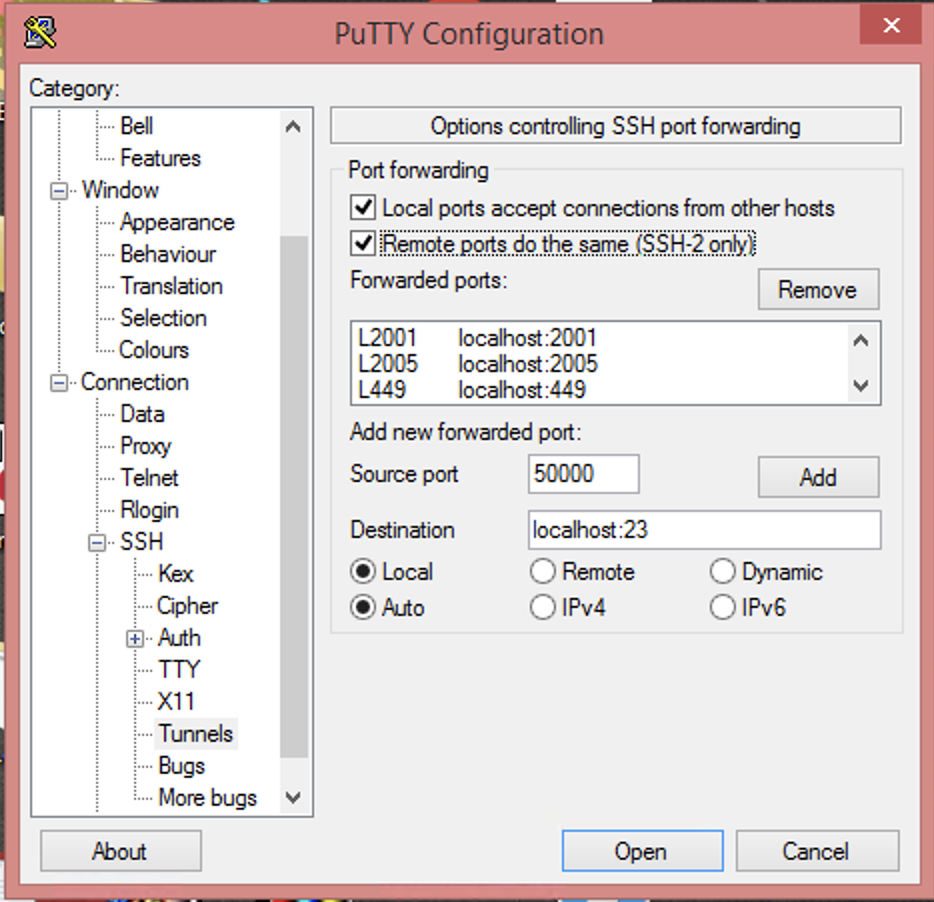
Next, in the left side navigation pane, expand the Connection tree. Then expand the SSH tree. Within that tree, click on Tunnels. On that screen:
- Check “Local ports accept connections from other hosts”
- Check “Remote ports do the same (SSH-2 only)”
Next, add and properly set the ports from the required port list above. Those ports, 23, 2001, 2005, 449, and 8470-8476 each need added. For each port:
- Enter the port number into the Source port field.
- Set Destination to
localhost:. - Click Add.
- Repeat these steps until all of the required ports are added.
- For destination port 23, the Source port should be set to
50000.
Click on Session in the left navigation window. Give the just completed configuration a name, and click Save. This will prevent having to perform the previous steps again for this VM.
At the bottom of the PuTTY Configuration window, click Open. This starts the PuTTY session and begins port forwarding. A prompt to accept the remote system key on first use will appear. Click Accept. Then, log in using QSECOFR or another configured user.
Configuring iACS to use forwarded ports
Next, configure iACS to use forwarded ports. Do this only after port forwarding has been configured and started.
Create a new 5250 session in iACS.
- Use localhost, or 127.0.0.1 for the destination address.
- Set the Destination Port to 50000.
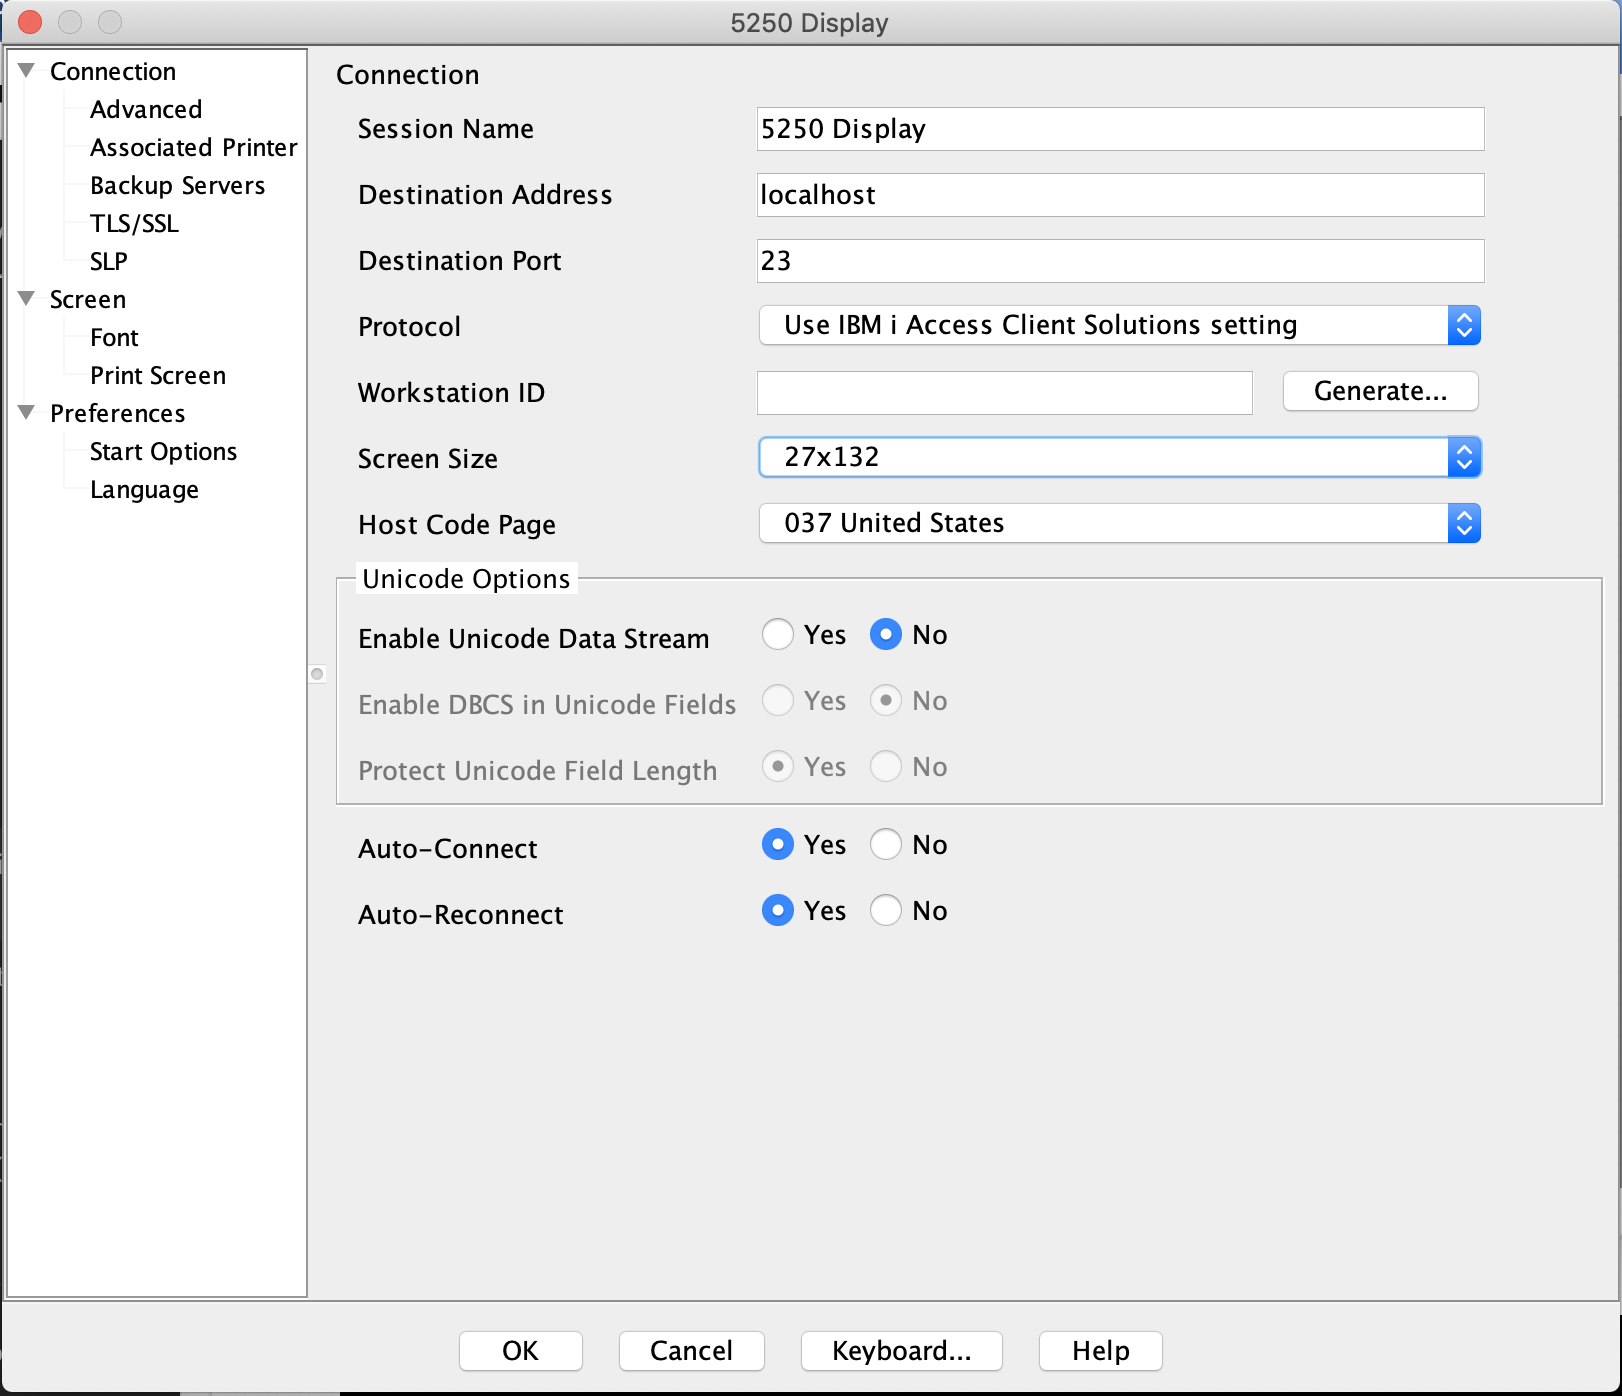
Click OK and connect to the system.
Additionally, IBM i Navigator can be accessed through the following URL:
3 - Preparing systems for migration
Use the following prerequisites and recommendations to ensure a successful migration to IBM Power for Google Cloud (IP4G).
For IBM i systems, ensure that the operating systems are running the following minimum versions:
| IBM i version | Minimum PTF Level | Notes |
|---|---|---|
| 7.2 | TR8 | Only on Power 9 systems. 7.2 has been withdrawn from support. |
| 7.3 | TR12 | |
| 7.4 | TR6 | |
| 7.5 | Supported in base release. |
Additional software requirements:
- Ensure PASE and Open Source environment is installed and boostrapped.
- Ensure cloud-init is installed. It is required to support IBM i OS licensing functions. Be aware, there are several prerequisites to install for cloud-init.
Additional recommendations:
- If possible, ensure that source systems have the latest PTF kit for their OS level installed.
- If possible, ensure that all PTFs required for iSCSI VTL connectivity are installed. See the following site for a list of specific PTFs: (https://www.ibm.com/support/pages/ibm-i-removable-media-support-iscsi-vtl)
4 - Configuring an IBM i Virtual Machine Instance
Storage volumes and Operating Systems
The number of storage volumes per VM varies by Operating System. IBM i 7.2, and later operating systems, support 127 storage volumes. Operating systems earlier than IBM i 7.2 support 64 storage volumes.
Accessing the IBM i console
For information about accessing the IBM i console, see Accessing the IBM i Console.
Tips for working with the IBM i console:
- The default IBM i user and password are QSECOFR and QSECOFR, respectively.
- When the VM is first provisioned, cloud-init will be executed. This will create two interfaces that IP4G will use to configure the IP address and inject license keys. Do not restart the system until cloud-init has finished and the VM is available on the network, you should see that the VM health status is ‘OK’ and you can access the console and see the initial ibmi screen. If cloud-init is interrupted, a support case must be opened to run the initial provisioning again, or delete and recreate the VM.
Licensing information
License keys are injected automatically during the provisioning process via cloud-init. Upon first login, the license agreements will need to be accepted.
For more information about minimum supported OS version and PTF levels, see Preparing systems for migration.
After deploying an IBM i VM, accept the license agreements. To accept the license agreements from the console, Select all with a 5 next to each license agreement. Click “Next…” and PF15 to show more items. After accepting the license agreements, press PF3. Then, wait until cloud-init configures the network and injects license keys.
Verifying the cloud-init configuration
The cloud-init configuration process can take up to five minutes. Do not restart the VM while cloud-init is executing, you should see that the VM health status is ‘OK’. If the VM is restarted during this time, support must be contacted. They will have to manually configure network and license keys.
Use the CFGTCP command to verify cloud-init correctly configured TCP/IP addresses. Enter the command, then choose Option 1. Verify the IP addresses match the VM’s internal IP addresses.
The example image below shows the Work with TCP/IP Interfaces window.

If the external IP address is not displayed, wait approximately ten minutes. Then, refresh the terminal. Ping the external TCP/IP address. The external address must match what is shown in the IP4G user interface under VM Instances –> <server name>. Contact support or delete and reprovision the IBM i VM if the system cannot be reached.
Changing the default passwords
The System Service Tools (SST) and Dedicated Service Tools (DST) passwords are set to QSECOFR/QSECOFR. Service Tools access will be required to configure any newly-atttached disks. To change the System Service Tools (SST) and Dedicated Service Tools (DST) passwords complete the following steps.
- Enter the STRSST command.
- At the SST login screen, log in using QSECOFR/QSECOFR. Change the password if prompted.
- Use the SST functions to add additional disks to any ASP configuration.