General guides and how-to documents for IP4G that apply to any operating system.
This is the multi-page printable view of this section. Click here to print.
General How-To Documents
- 1: Creating a virtual machine
- 2: CPU Types
- 3: Creating a new VM with an SSH key for root
- 4: Importing an OVA file into your Power cloud instance
- 5: Capturing and exporting a virtual machine
1 - Creating a virtual machine
Complete the following steps to create and configure an IBM Power for Google Cloud (IP4G) virtual machine (VM).
Creating an IP4G virtual machine instance
Follow these steps to create an IP4G virtual machine instance from the GUI. To create one from the CLI, see CLI VM Creation
- Navigate to the IP4G User Interface using the following URL: pforg
- Click Create Instance from the VM Instances of the interface.
If no customer-specific images have been created, import a stock image. See Adding Images to the Image Catalog
Configuring a Power Systems virtual machine instance
Follow these steps to configure a new virtual machine instance.
Complete all the fields under the virtual machines section.

- Name - Input a name for the virtual machine.
- VM pinning - Select one of the options. Note that VM pinning is not available in all regions.
- Number of Instances - Use the slide bar to set the number of instances. When creating an IBM i VM, this can only be set to 1.
When more than one instance is selected, Affinity Policy and Naming Convention information is available.
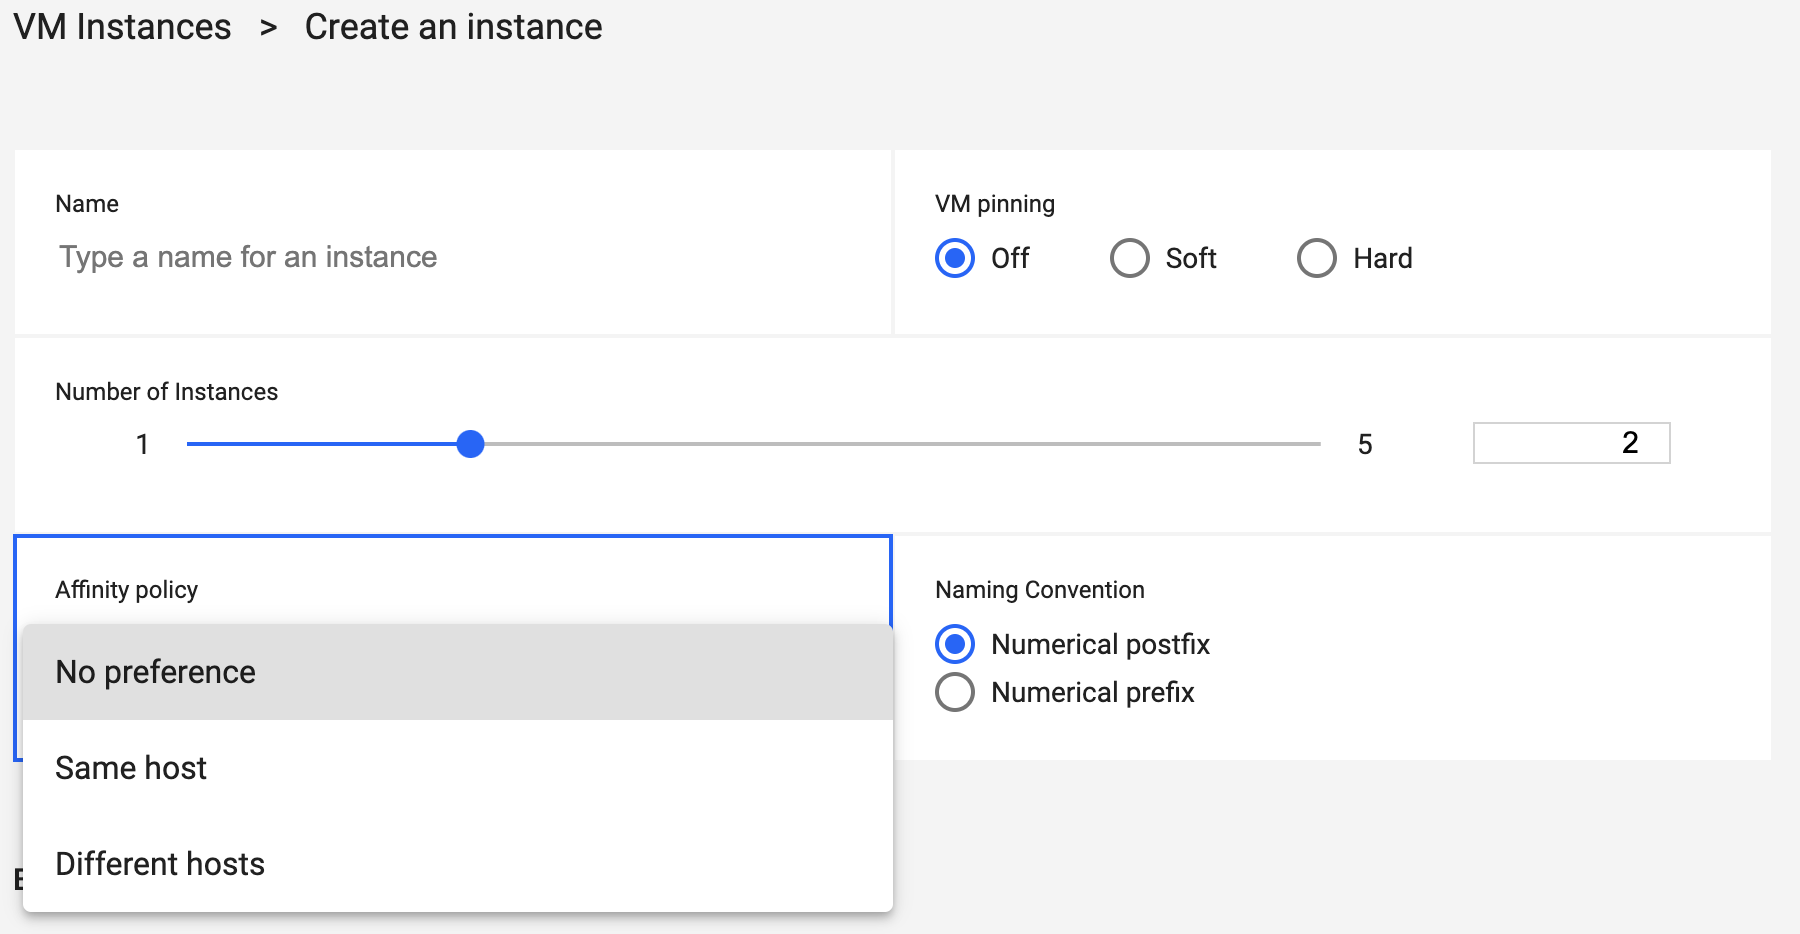
- Affinity Policy - Select the proper option. Not available for IBM i.
- Virtual Machine Naming Convention - Select Postfix or Prefix to add a suffix or prefix to VMs.
Complete the Boot Image fields. Select the proper type from the drop-down menus.

- Operating system - Select the VM’s operating system.
- System Type - Select the VM’s operating system.
- Image - Select the VM’s image.
- Storage type - Select the storage type.
Complete the Processing Profile fields.
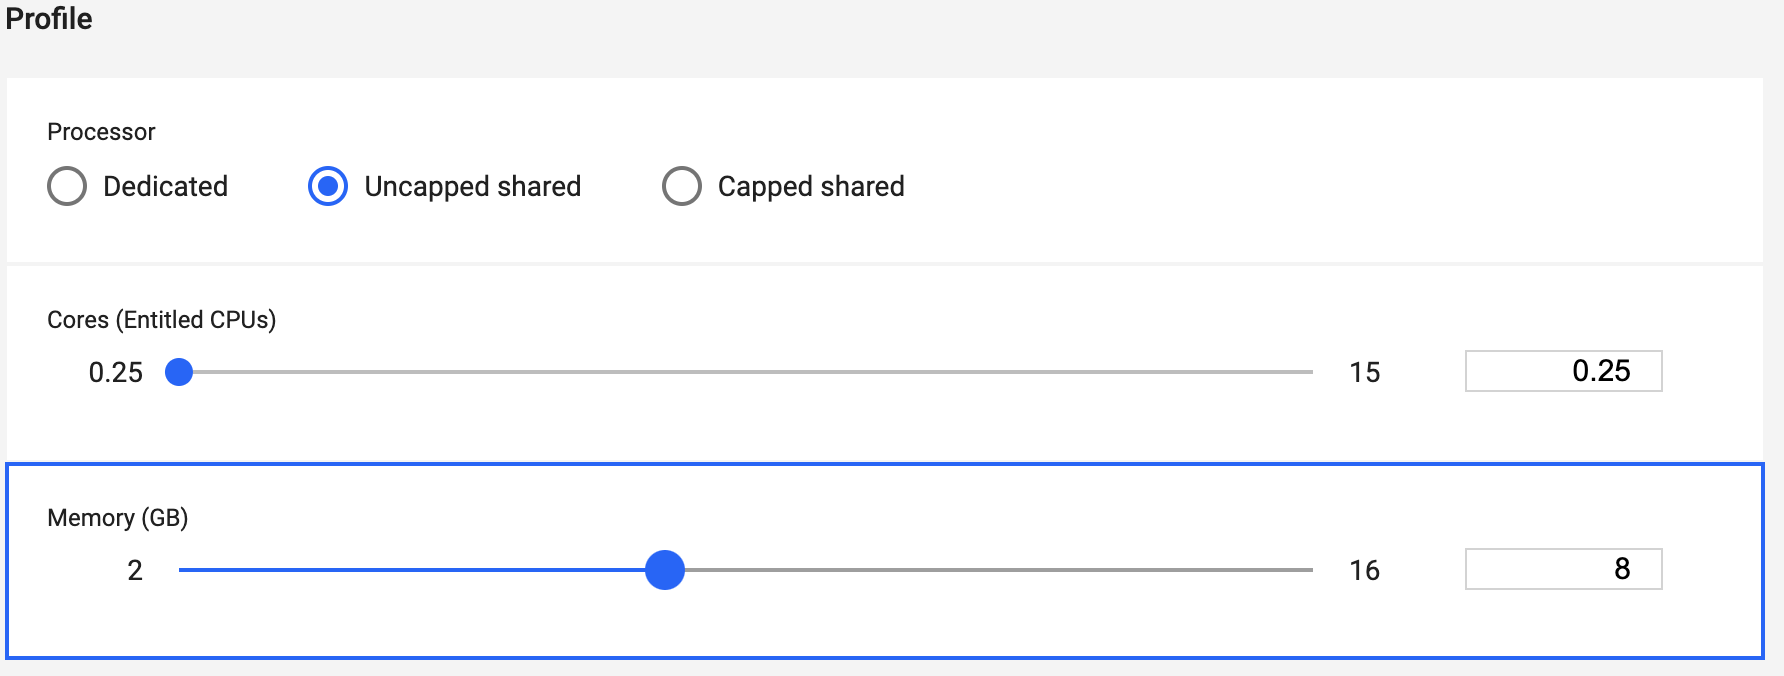
- Processor - Select the correct processor type.
- Cores - Use the slider to select the desired number of cores.
- Memory - Use the slider to set the amount of memory, in GBs.
Complete the Networks fields.
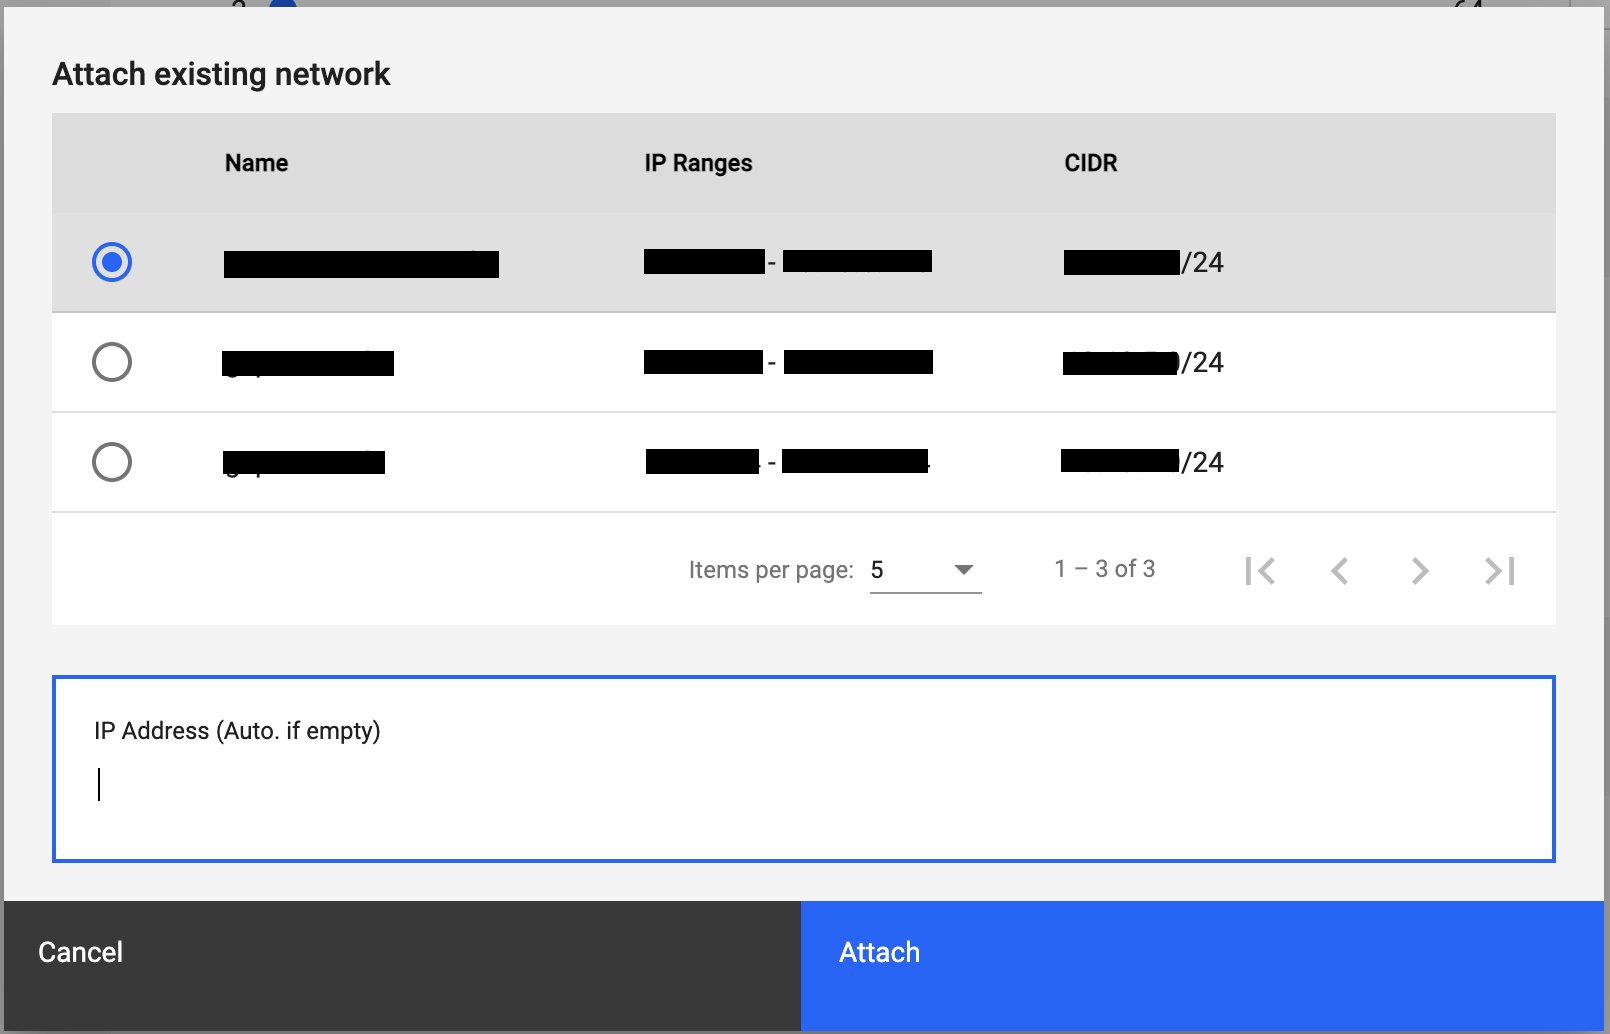
- Attach existing network - Select the network to attach from the listed options.
- IP Address - Optional. Provide the VM’s TCP/IP address. If not set specifically, one will be assigned automatically.
Complete the Volumes fields.
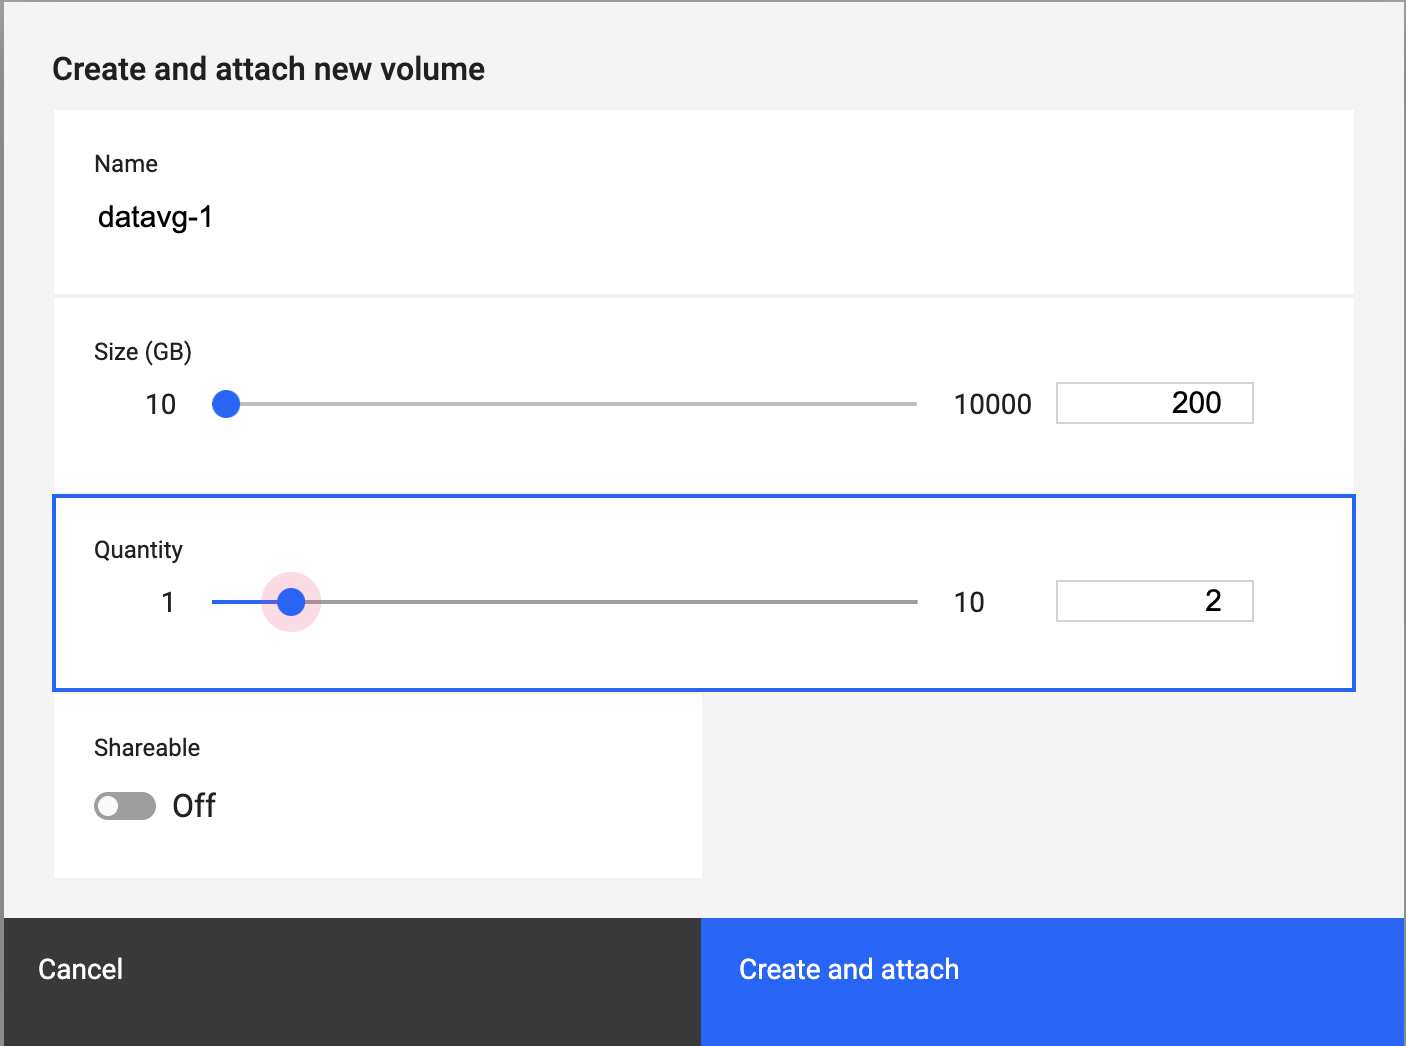
- Name - Use this field to put in a name for the volume.
- Size - Use the slider to set the volume size, in GBs.
- Quantity - Use the slider to set the number of volumes.
- Shareable - Use this to toggle the ability for sharing volumes.
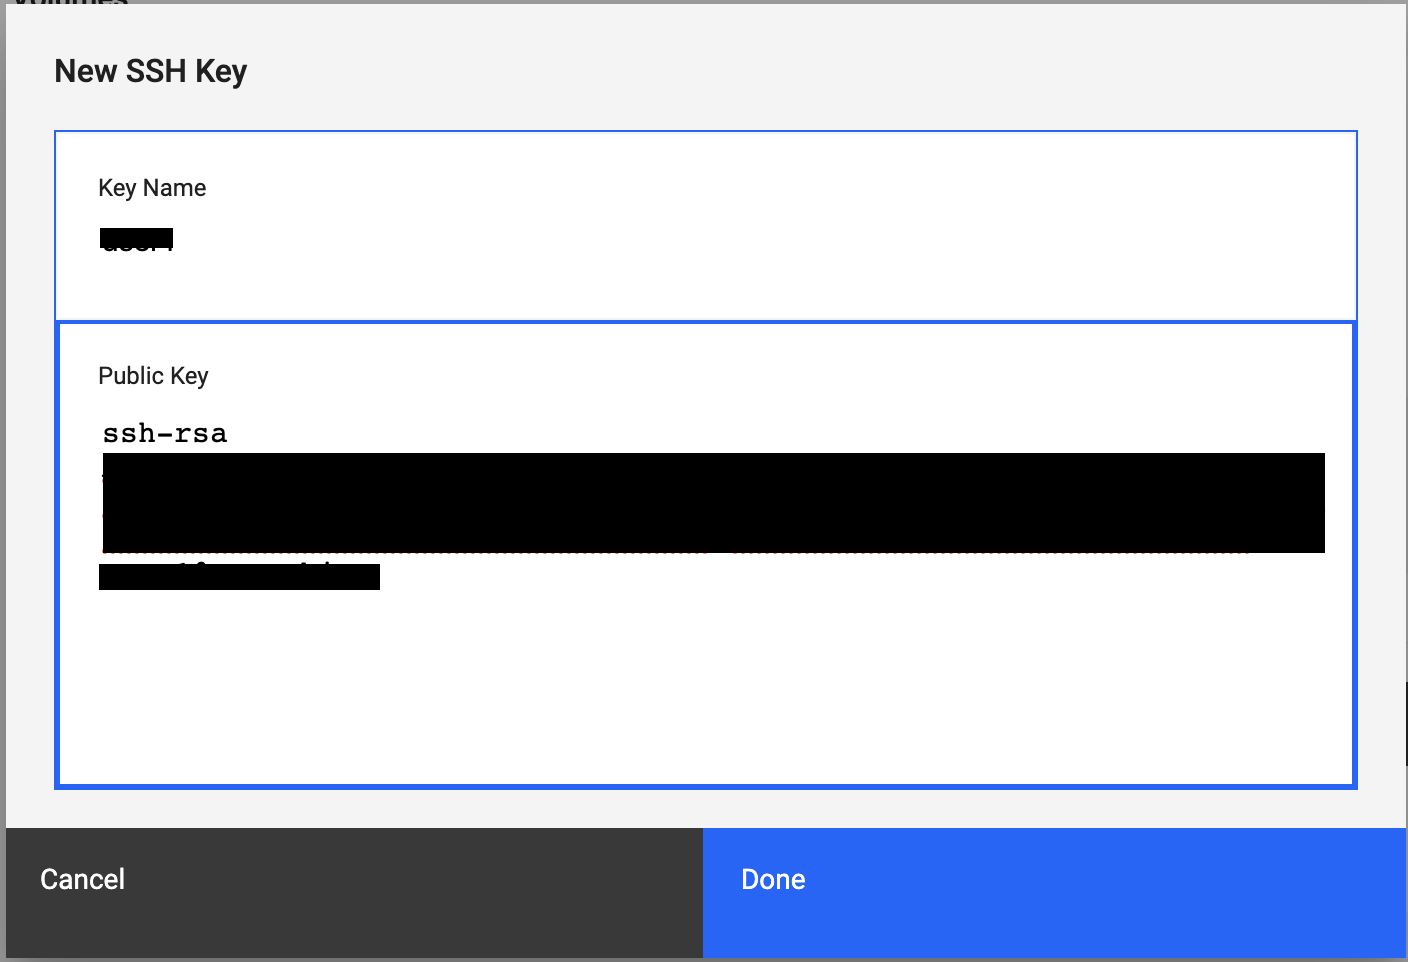
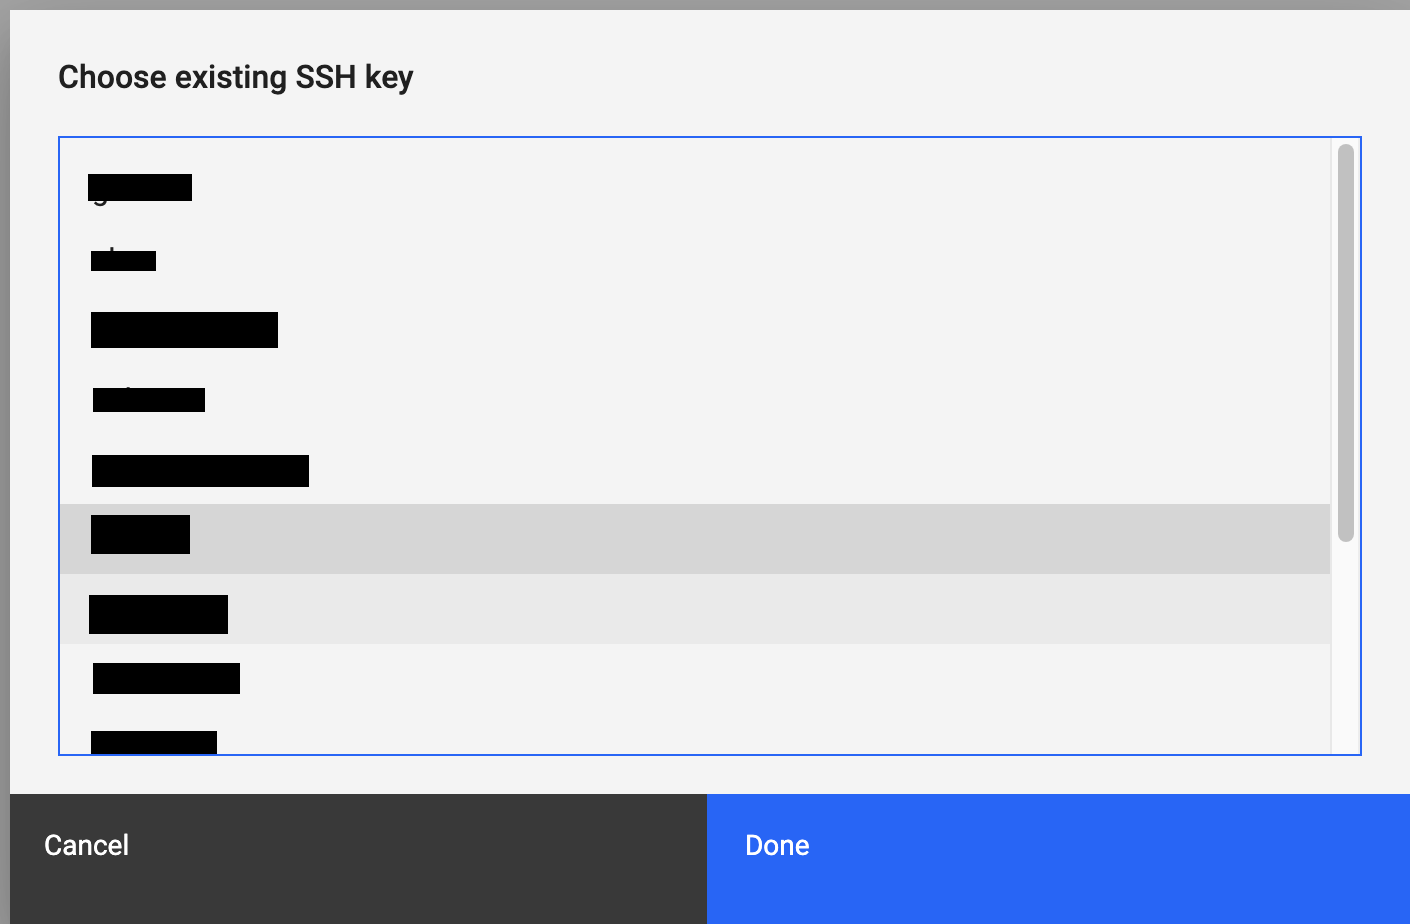
Complete the various SSH Key fields. Choose to create a new SSH or use an existing.

- New SSH Key
- Choose existing SSH key
Review your selections for accuracy and submit the form.
2 - CPU Types
A Virtual Machine’s (VM) CPU allocation is determined by its Entitlement. Entitlement represents the guaranteed minimum amount of physical CPU resources available to the VM. When you provision a VM and set its Entitlement, you ensure that the VM will receive at least that level of CPU performance when needed. The vCPU value, which indicates the number of virtual processors available to the VM, is derived from the Entitlement. For VMs using shared processors, the vCPU value is set to the Entitlement rounded to the nearest whole number. In the case of VMs with dedicated processors, the vCPU value is equal to the Entitlement.
There are two primary processor types. Shared and dedicated. Shared processors can be broken down into capped or uncapped shared processors.
| CPU Type | Increment | Description |
|---|---|---|
| uncapped shared | 0.25 | CPU entitlement is guaranteed, vCPU is set to Entitlement rounded up to the nearest whole number. CPU may consume up to the vCPU value if busy. |
| capped shared | 0.25 | CPU entitlement is guaranteed, vCPU is set to Entitlement, rounded up to the nearest whole number. VM Cannot consume more CPU than its entitlement. |
| dedicated | 1 | CPU entitlement is guaranteed, VM is allocated whole CPUs. |
3 - Creating a new VM with an SSH key for root
You can set up one or more SSH keys for root login when you create new virtual machines (VM) on a Power cloud instance. The keys are loaded into the root’s authorized_keys file. SSH keys allow you to securely log in to a VM. You must use the available operating system options to create SSH keys. To generate SSH keys on a Linux® or Mac OS system, for example, you can use the standard ssh-keygen tool.
Setting up an SSH key to be used in a VM create
In this example, the user created a public key on a Linux-based GCP compute instance by using the ssh-keygen tool:
> $ cat .ssh/id_rsa.pub
ssh-rsa AAAAB3NzaC1yc2EAAAADAQABAAABAQCtuQnQOc2k4zaGzE7b3xUMCjUy++s/9O9HE4fXSm7UNKoTY39zjQ8mhOwaA3HEo12tOdzdFDYHHWNOYufCcFFk61CAL6HyQGGClib1nFc1xUcgTI9Dee8zzaAsN8mIIr1CgbRELhvOsTv23U4QddpfjkcVoKfF0BAtxgauvooQdPZBoxa2rsD+BvcWnjglkYWG2aBbuzFvSl1fLMihjfej8w1lxbcsYEcJg2X96NJPLmLsEJ+XwoXfVuv0X4z8IoBzZ8UbyTlrDv73EAH34GViYfZFbrIaNnwnz/f/tuOKcINihH72YP+oZn9JeiHQ+hKpMqJAmOK2UIzYr3u+79n9 testkey
To use an SSH key with a VM create operation, you must first add the public key to the cloud instance by using the pcloud compute sshkeys create command. To add the ssh-keygen-generated public key, enter the following command (replacing the public key value with your own):
Important: You must enclose the --publickey value in quotations.
$ pcloud compute sshkeys create testkey --publickey "ssh-rsa AAAAB3NzaC
1yc2EAAAADAQABAAABAQCtuQnQOc2k4zaGzE7b3xUMCjUy++s/9O9HE4fXSm7UNKoTY39zjQ8mhOwaA3HEo12tOdzdFDYHHWNOYufCcFFk61CAL6HyQGGClib1nFc1xUcgTI9Dee8zzaAsN8mIIr1CgbRELhvOsTv23U4QddpfjkcVoKfF0BAtxgauvooQdPZBoxa2rsD+BvcWnjglkYWG2aBbuzFvSl1fLMihjfej8w1lxbcsYEcJg2X96NJPLmLsEJ+XwoXfVuv0X4z8IoBzZ8UbyTlrDv73EAH34GViYfZFbrIaNnwnz/f/tuOKcINihH72YP+oZn9JeiHQ+hKpMqJAmOK2UIzYr3u+79n9 testkey"
SSHKey created: testkey
To confirm that the key was successfully added, use the pcloud compute sshkeys list command.
$ pcloud compute sshkeys list
Name      Key                                          CreationDate
testkey   ssh-rsa AAAAB3NzaC1y...UIzYr3u+79n9 testkey  2019-07-26T18:21:56.030Z
Creating a VM instance with a configured SSH key
Now that you’ve added the key to the cloud instance, you can create a new VM with the key by using the following command:
$ pcloud compute instances create keytest-vm -i AIX-7200-03-03 -t shared -p 0.5 -m 5 -n gcpnetwork -k testkey
The preceding VM create operation resulted in a new AIX VM with an IP address of 172.16.7.16. You can now SSH to the AIX VM can from a connected system, which is configured with the private key for testkey. In the following example, the connecting system is a GCP x86 compute instance with direct connectivity to the Power cloud instance network.
$ ssh root@172.16.7.16
Enter passphrase for key '/home/keytest/.ssh/id_rsa':
Last login: Fri Jul 26 16:53:22 CDT 2019 on ssh from 10.150.0.11
*******************************************************************************
*                                                                             *
*                                                                             *
*  Welcome to AIX Version 7.2!                                                *
*                                                                             *
*                                                                             *
*  Please see the README file in /usr/lpp/bos for information pertinent to    *
*  this release of the AIX Operating System.                                  *
*                                                                             *
*                                                                             *
*******************************************************************************
# oslevel -s
7200-03-03-1914
#
On this AIX VM, you can find the testkey value in the authorized_keys file.
> \# cat .ssh/authorized_keys
ssh-rsa AAAAB3NzaC1yc2EAAAADAQABAAABAQCtuQnQOc2k4zaGzE7b3xUMCjUy++s/9O9HE4fXSm7UNKoTY39zjQ8mhOwaA3HEo12tOdzdFDYHHWNOYufCcFFk61CAL6HyQGGClib1nFc1xUcgTI9Dee8zzaAsN8mIIr1CgbRELhvOsTv23U4QddpfjkcVoKfF0BAtxgauvooQdPZBoxa2rsD+BvcWnjglkYWG2aBbuzFvSl1fLMihjfej8w1lxbcsYEcJg2X96NJPLmLsEJ+XwoXfVuv0X4z8IoBzZ8UbyTlrDv73EAH34GViYfZFbrIaNnwnz/f/tuOKcINihH72YP+oZn9JeiHQ+hKpMqJAmOK2UIzYr3u+79n9 testkey
4 - Importing an OVA file into your Power cloud instance
You can import an OVA file to bring a new VM image and any attached data volumes into your Power cloud instance. An OVA file is an industry standard format that is used to package VM boot disk images and any related data volume images. If you are running an IBM Cloud PowerVC Manager 1.4.1, or later, landscape in your local environment, you can generate OVA files from your Power LPARs.
To bring an OVA file into your cloud instance image catalog and deploy it as a new VM, complete the following steps:
Start with a local OVA file that was generated by your existing PowerVC instance.
Upload the OVA file into a selected Google Cloud Storage bucket.
Set up access keys to the Google Cloud Storage bucket.
Note: Issuing the operation that imports the OVA file into your cloud instance provides the access keys.
Import the OVA file by using either the web UI or running the
pcloudcommand.After the import operation is complete, you can deploy a VM by using the new image in your image catalog.
Setting up a cloud storage bucket
You can set up a cloud storage bucket by using the pcloud command to import OVA files.
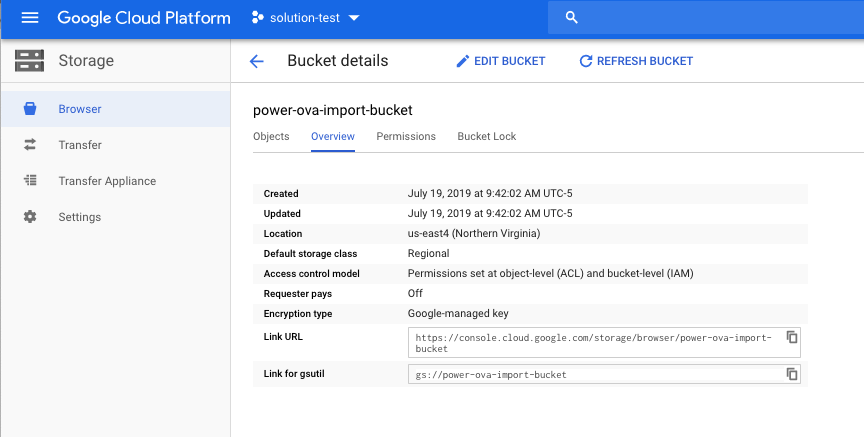
To begin, you must create a cloud storage bucket. The following graphic provides an overview of a user-created cloud storage bucket named power-ova-import-bucket. The Link for gsutil field contains access information that is an important part of the import operation.
To enable access to the cloud storage bucket for the Power Systems IaaS management service, you must create a storage access key. You can create a storage access key in the settings area of the cloud bucket management UI.
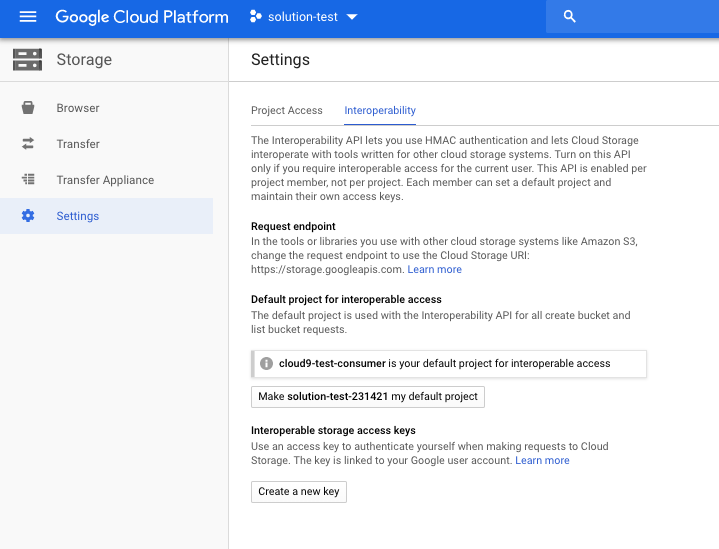
Selecting the create a new key option generates the access key and secret as shown in the following example:
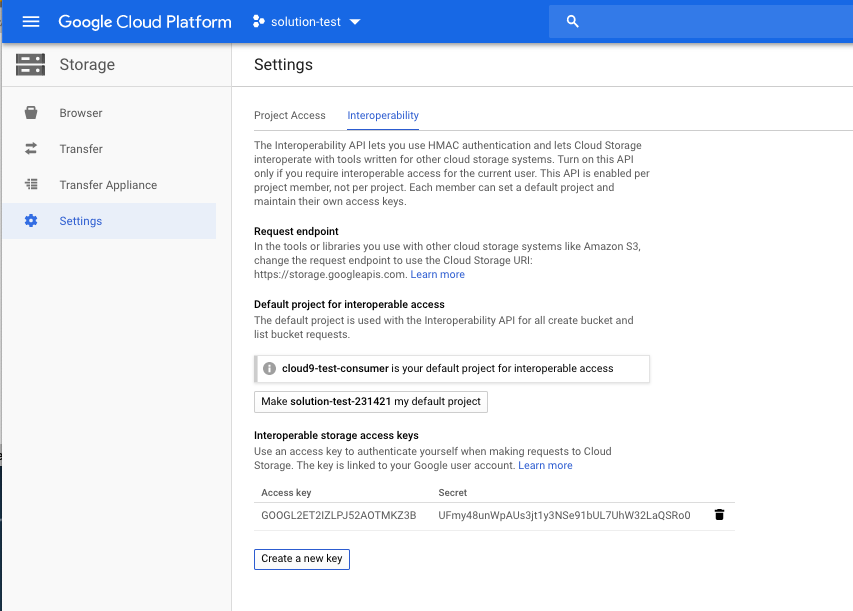
After you generate an access key and secret, the cloud storage bucket can hold OVA files and be used with the Power IaaS management service image import feature. You can upload files to the cloud storage bucket by using the upload files feature of the web UI or with the gsutil command. For more information, visit the Google Cloud Storage Documentation site.
In the following example, a user created an OVA file that is named AIX-7200-03-03.ova.gz and placed it in the cloud storage bucket.

Importing the OVA file into your cloud instance by using the pcloud command
The pcloud compute images import command imports an OVA file. For pcloud compute images import command usage and flag details, refer to the following code block:
$ pcloud compute images import -h

Import a new Image for a Cloud Instance.

Usage:
  pcloud compute images import <ImageName> --bucketname <Bucket> --filename <ImageFileName> --accesskey <AccessKey> --secretkey <SecretKey> [flags]

Flags:
  -a, --accesskey string     Cloud Storage Access Key (required)
  -b, --bucketname string    Cloud Storage Bucket (bucket name plus optional folders): bucket-name[/folder/../] (required)
  -f, --filename string      Cloud Storage Image File Name, should end with .ova, .ova.gz, .tar, .tar.gz or .tgz (required)
  -h, --help                 help for import
  -s, --secretkey string     Cloud Storage Secret Key (required)
  -t, --storagetype string   Storage Type (must be one of {"standard", "ssd"}) (default "standard")

Global Flags:
  -F, --format string      Available formats: 'table', 'yaml', 'json', 'csv'.
                            Default is command specific.
                            Can be used with describe and list subcommands.
  -D, --log.dir string     Override Log file directory
  -L, --log.file string    Override Log file name
  -V, --verbosity string   Override Log verbosity
ImageName- the argument that assigns a name to the image after you import it into your image catalog.Bucket- the argument that provides the gsutil path to the cloud storage bucket where the OVA file resides. The path specification can include the gs:// prefix or ignore it.ImageFileName- the name of the OVA file residing in the cloud storage bucket.AccessKey- the generated storage access key. See the cloud bucket management UI settings.SecretKey- the generated secret key. See the cloud bucket management UI settings.
The following example shows a customer importaning an OVA file by using the pcloud command:
pcloud compute images import aix72-ova-import -p gs://power-ova-import-bucket -f AIX-7200-03-03.ova.gz -a GOOGL2ET2IZLPJ52AOTMKZ3B -s UFmy48unWpAUs3jt1y3NSe91bUL7UhW32LaQSRo0
Image created with "b05cde35-680b-47b6-85a8-b38404e5e64e" ID while doing "import" operation on "power-ova-import-bucket/7200-03-03.ova.gz" Image (complete Image import is not immediate)
Note: The pcloud command returns immediately. However, the actual time for the import operation to complete depends on the OVA file size.
The pcloud compute images describe command monitors the progress of the import operation. While the import operation is in progress, the image state is queued as in the following example:
$ pcloud compute images describe aix72-ova-import

imageID: d090596b-3f55-4034-90d4-e519ff9e737e
name: aix72-ova-import
cloudID: ""
description: ""
size: 0
operatingSystem: aix
architecture: ppc64
state: queued
containerFormat: bare
diskFormat: raw
endianess: ""
creationDate: "2019-07-19T15:35:39.000Z"
updateDate: "2019-07-19T15:35:39.000Z"
After the import operation finishes, the image state transitions to active.
$ pcloud compute images describe aix72-ova-import

imageID: d090596b-3f55-4034-90d4-e519ff9e737e
name: aix72-ova-import
cloudID: ""
description: ""
size: 20
operatingSystem: aix
architecture: ppc64
state: active
containerFormat: bare
diskFormat: raw
endianess: big-endian
creationDate: "2019-07-19T15:35:39.000Z"
updateDate: "2019-07-19T15:40:50.000Z"
The image is now part of the image catalog for the cloud instance and can be used to create new VMs. You can also delete the OVA file from the cloud storage bucket and remove the access keys.
$ pcloud compute images list

ImageID                               Name
8f718bb5-495c-4a0d-b537-d2ad4b03f8c1  AIX-7200-03-03
d090596b-3f55-4034-90d4-e519ff9e737e  aix72-ova-import
Creating a new VM with the imported image
You can create a VM with the newly imported image by typing in the following command:
$ pcloud compute instances create import-test-vm -t shared -p 1 -m 6 -n gcp-network -i aix72-ova-import

"import-test-vm" VM Instance being created (complete VM Instance creation is not immediate)
After a short period, the VM is deployed and is ready for access.
$ pcloud compute instances describe import-test-vm

instanceID: 8ac6c2eb-8497-444e-9aac-5b9b31a97aed
name: import-test-vm
cloudID: 7f16fae4f3f54d8bb62f75645db56905
processors: 1
procType: shared
memory: 6
migratable: false
status: ACTIVE
health: OK
systemType: IBM S922
imageID: d090596b-3f55-4034-90d4-e519ff9e737e
networks:
- ipAddress: 192.168.0.10
  macAddress: fa:86:bc:91:9d:20
  networkName: gcp-network
  networkID: 8e72b5cc-9e50-4b06-bc56-eb4e1781eefe
volumeIDs:
- 122405f4-14a9-49f0-a665-2b3c08f4a3f4
creationDate: "2019-07-19T16:20:49.000Z"
updateDate: "2019-07-19T16:20:49.000Z"
$ pcloud compute instances console import-test-vm

console: https://pforg.ibm.com/console/index.html?token=<token>
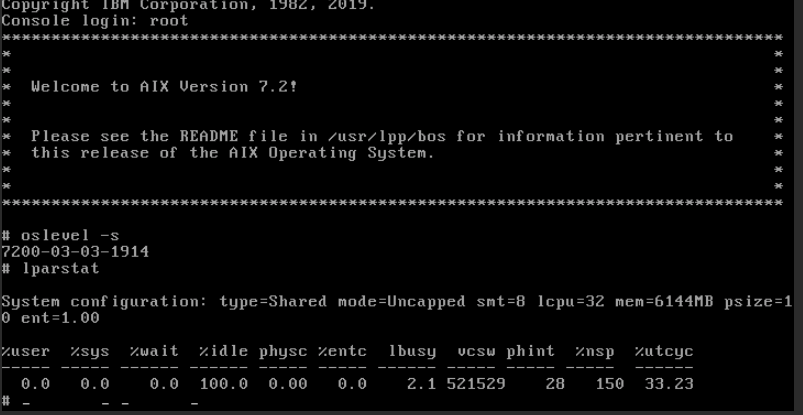
To verify that the VM is working correctly, log into the system using the AIX console.
5 - Capturing and exporting a virtual machine
Virtual machine (VM) instances can be captured and exported from the IBM Power for Google Cloud Platform (IP4G) service. This can be done through either the command line interface (CLI) or web interface. The captured image is stored as a new volume on the back end storage. A captured image can then be exported to Google Cloud Storage. Images are exported in an Open Virtualization Appliance (OVA) file. OVA files are compressed using gzip before export to Google Cloud Storage.
When capturing an image, an export destination of “image catalog” and/or “cloud storage” can be selected. The image catalog resides in the customer’s IP4G storage area. It can be used as a template to create new VMs. The cloud storage option transfers the image to Google Cloud Storage immediately. Images in the image catalog are transferrable to cloud storage at a later date as well.
Only one Image Capture and Export or Import function can be performed at a time.
Flush file system buffers to disk
Images captured from running VMs will be captured in a “crash-consistent” state. For best results, when possible, capture images with the VM shut down. If a VM cannot be stopped before capture, it is recommended to flush the file system buffer cache to disk. Use the following commands to accomplish this:
- IBM i: Use the following command to flush all buffers to disk. Do this prior to capturing the image to ensure data integrity.
CHGASPACTOPTION(*FRCWRT)
- AIX or Linux: Use the following command to flush file system bufers to disk:
sync; sync; sync
Performing capture and export via the IP4G user interface
Use the following steps to perform a capture and export through the IP4G interface.
- Navigate to the IP4G Console. Select the desired virtual machine to capture.
- Select the Capture and Export icon in virtual machine instance view. The icon appears in the upper left corner.
- All volumes for the virtual machine are automatically captured by default.
- Determine where the volume backed image or OVA will be exported. Either: image catalog, Cloud Storage, or both.
- Provide the captured image a Name.
- Optional: when exporting to Cloud Storage, specify the following additional parameters:
- Bucket name and any optional folders.
- Access and Secret Keys.
- Select Capture and export.
- After a successful capture or export, a confirmation message is displayed. It will read “When large volumes (in size and/or quantity) are selected, export processing may take a significantly long period of time to complete.”
- Find the newly exported image by completing either one of the following tasks:
- If Cloud Storage was selected for the export, navigate to the Cloud Storage bucket in GCP.
- If image catalog was selected for the export, navigate to Boot images in the IP4G user interface.
- Optional: volume backed images in image catalogs can also be exported to Cloud Storage. After choosing the desired Boot Image, select the Export function on the top of the screen.
Performing capture and export using the pcloud CLI
The pcloud CLI can also be used to capture and export a virtual machine image.
The pcloud compute instances capture command can be used to capture a virtual machine image. The image can be exported to an image catalog, Cloud Object Storage, or both.
Capture VM Instance to image catalog:
pcloud compute instances capture <InstanceName> --destination image-catalog --name <ImageName>
Capture VM Instance to Google Cloud Storage:
pcloud compute instances capture <InstanceName> --destination [cloud-storage|both]
--name <ImageName> --bucketname <Bucket> --accesskey <AccessKey> --secretkey <SecretKey> [flags]
Use the following command to view exported images in the image catalog:
pcloud compute images list